REASSEMBLY PROCEDURE 1. INSTALL PLANETARY GEAR (a) Apply high-temperature grease to the 3 planetary gears, 3 planetary gear shafts and repair service starter kit. 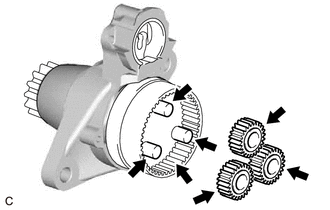
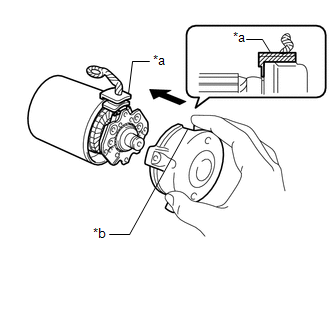
(b) Install the 3 planetary gears to the repair service starter kit. 2. INSTALL STARTER ARMATURE ASSEMBLY (a) Install the starter armature assembly to the starter yoke assembly. NOTICE: The magnet of the starter yoke assembly may attract the starter armature assembly when the starter commutator end frame assembly is installed, causing the magnet to break. 3. INSTALL STARTER BRUSH HOLDER ASSEMBLY
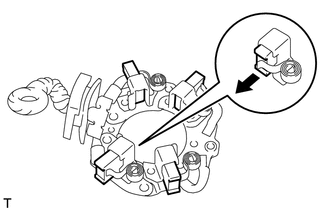
4. INSTALL STARTER COMMUTATOR END FRAME ASSEMBLY
(b) Install the 2 screws. Torque: 1.5 N·m {15 kgf·cm, 13 in·lbf} 5. INSTALL STARTER ARMATURE PLATE
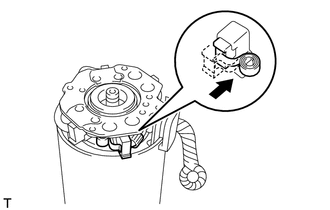
6. INSTALL STARTER YOKE ASSEMBLY
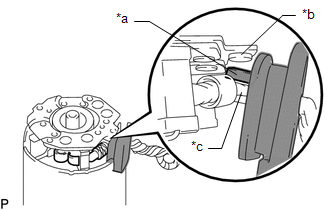
(b) Using a T25 "TORX" socket wrench, install the starter yoke assembly with the 2 through bolts. Torque: 6.0 N·m {61 kgf·cm, 53 in·lbf} 7. INSTALL MAGNET STARTER SWITCH ASSEMBLY (a) Apply high-temperature grease to the plunger as shown in the illustration. 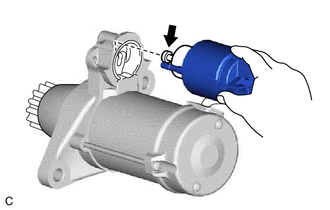
(b) Hang the hook of the magnet starter switch assembly on the pinion drive lever. (c) Install the magnet starter switch assembly with the 2 nuts. Torque: 7.5 N·m {76 kgf·cm, 66 in·lbf} (d) Connect the field coil lead wire to the magnet starter switch assembly with the nut. Torque: 10 N·m {102 kgf·cm, 7 ft·lbf} |
Toyota Avalon (XX50) 2019-2022 Service & Repair Manual > Automatic Transaxle System: Terminals Of Ecm
TERMINALS OF ECM ECM HINT: The standard voltage and resistance of each ECM terminal is shown in the table below. In the table, first follow the information under "Condition". Look under "Terminal No. (Symbol)" for the terminals to be inspected. The standard voltage or resistance between the terminal ...