INSTALLATION PROCEDURE 1. INSTALL CHARCOAL CANISTER LEAK DETECTION PUMP SUB-ASSEMBLY HINT: Only perform this procedure when replacement of the charcoal canister charcoal canister leak detection pump sub-assembly is necessary.
2. INSTALL CANISTER (CHARCOAL CANISTER ASSEMBLY) (a) Install the clip to the vehicle body.
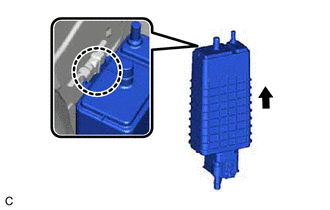
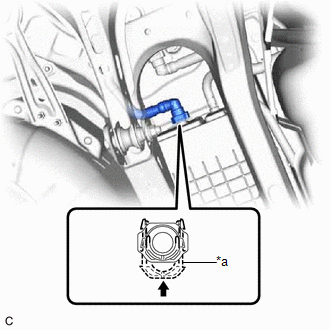
(c) Engage the clip to connect the canister (charcoal canister assembly). (d) Install the 2 bolts. Torque: 8.0 N·m {82 kgf·cm, 71 in·lbf} (e) Connect the purge line hose to the canister (charcoal canister assembly) and slide the clip to secure it. (f) Push the fuel tank vent hose onto the canister (charcoal canister assembly) and push in the retainer to engage the lock claws. NOTICE:
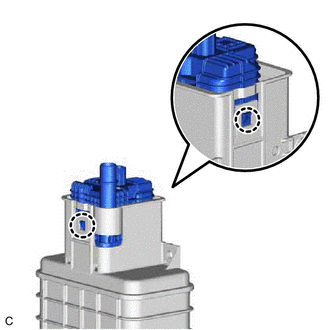
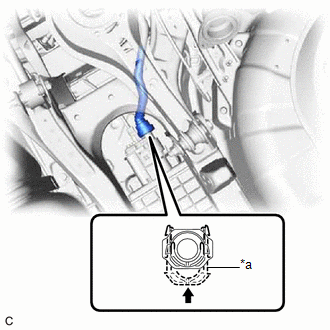
(g) Connect the charcoal canister leak detection pump sub-assembly connector. (h) Push in the fuel tank vent hose sub-assembly onto the charcoal canister leak detection pump sub-assembly and push in the retainer to engage the lock claws. NOTICE:
3. INSTALL REAR STABILIZER BAR (a) Install the rear stabilizer bar with the rear No. 1 stabilizer bar bracket LH, rear No. 1 stabilizer bar bracket RH and 4 bolts. Torque: 78 N·m {795 kgf·cm, 58 ft·lbf} |
Toyota Avalon (XX50) 2019-2022 Service & Repair Manual > Window Defogger System(for Gasoline Model): System Diagram
SYSTEM DIAGRAM Communication Table Transmitter Receiver Signal Communication Method Rear Window Defogger Switch (Radio and Display Receiver Assembly) Air Conditioning Amplifier Assembly Rear Window Defogger Switch Signal CAN ...