Components COMPONENTS ILLUSTRATION 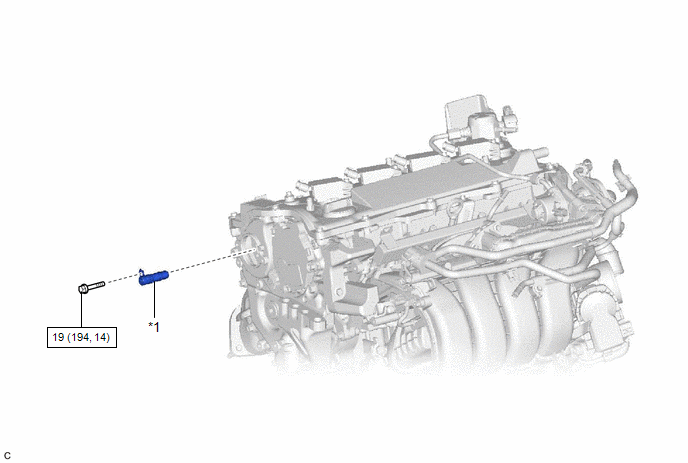
Installation INSTALLATION CAUTION / NOTICE / HINT NOTICE: This procedure includes the installation of small-head bolts. Refer to Small-Head Bolts of Basic Repair Hint to identify the small-head bolts. Click here
PROCEDURE 1. INSTALL CAMSHAFT TIMING OIL CONTROL VALVE ASSEMBLY (EXHAUST CAMSHAFT TIMING GEAR BOLT ASSEMBLY)
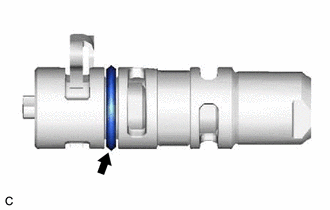
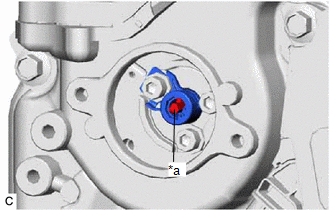
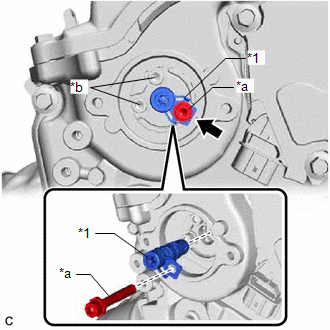
(b) Temporarily install the camshaft timing oil control valve assembly (exhaust camshaft timing gear bolt assembly) to the camshaft timing exhaust gear assembly. NOTICE: If the camshaft timing oil control valve assembly (exhaust camshaft timing gear bolt assembly) has been struck or dropped, replace it. (c) Using a 5 mm hexagon socket wrench, install the camshaft timing oil control valve assembly (exhaust camshaft timing gear bolt assembly) with the bolt. Torque: 19 N·m {194 kgf·cm, 14 ft·lbf} 2. INSTALL CAM TIMING OIL CONTROL SOLENOID ASSEMBLY Click here On-vehicle Inspection ON-VEHICLE INSPECTION PROCEDURE 1. REMOVE CAM TIMING OIL CONTROL SOLENOID ASSEMBLY Click here
2. INSPECT CAMSHAFT TIMING OIL CONTROL VALVE ASSEMBLY (EXHAUST CAMSHAFT TIMING GEAR BOLT ASSEMBLY)
3. INSTALL CAM TIMING OIL CONTROL SOLENOID ASSEMBLY Click here
Removal REMOVAL CAUTION / NOTICE / HINT NOTICE: This procedure includes the removal of small-head bolts. Refer to Small-Head Bolts of Basic Repair Hint to identify the small-head bolts. Click here
PROCEDURE 1. REMOVE CAM TIMING OIL CONTROL SOLENOID ASSEMBLY Click here 2. REMOVE CAMSHAFT TIMING OIL CONTROL VALVE ASSEMBLY (EXHAUST CAMSHAFT TIMING GEAR BOLT ASSEMBLY)
(b) Remove the camshaft timing oil control valve assembly (exhaust camshaft timing gear bolt assembly) from the camshaft timing exhaust gear assembly. |
Toyota Avalon (XX50) 2019-2022 Service & Repair Manual > Engine Oil Temperature Sensor: Inspection
INSPECTION PROCEDURE 1. INSPECT ENGINE OIL TEMPERATURE SENSOR CAUTION: Do not put your hands into the water that has been heated for the inspection. Touching the heated water could result in burns. (a) Measure the resistance according to the value(s) in the table below. Standard Resistance: Tester C ...