INSTALLATION CAUTION / NOTICE / HINT HINT:
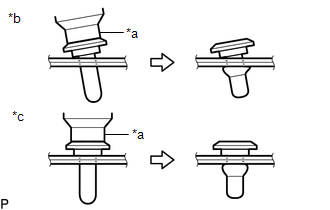
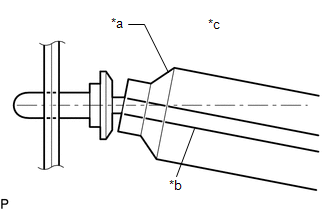
PROCEDURE 1. INSTALL NO. 3 WINDSHIELD OUTSIDE MOULDING CLIP HINT: Perform the following procedure only when replacement of a No. 3 windshield outside moulding clip is necessary. (a) Using a riveter with a nose piece, install 6 new No. 3 windshield outside moulding clips. HINT: If the mandrel of the No. 3 windshield outside moulding clip does not come off on the first operation of the riveter, slide the riveter forward on the mandrel and operate it again. NOTICE:
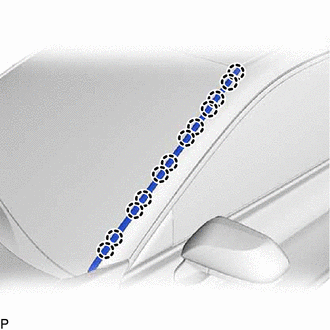
 (b) Install the windshield glass sub-assembly. Click here 2. INSTALL NO. 1 WINDSHIELD OUTSIDE MOULDING CLIP HINT: Perform the following procedure only when replacement of a No. 1 windshield outside moulding clip is necessary. (a) Engage the 6 claws to install the 6 No. 1 windshield outside moulding clips as shown in the illustration. 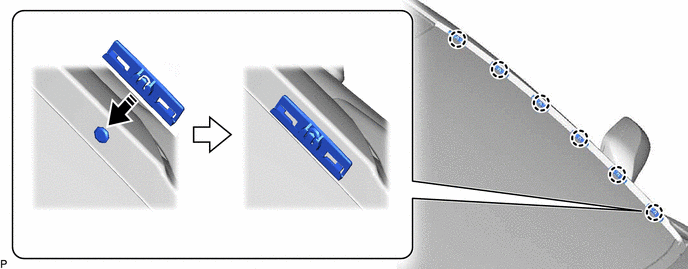
3. INSTALL LOWER WINDSHIELD OUTSIDE MOULDING
4. INSTALL FRONT FENDER TO COWL SIDE SEAL Click here
|
Toyota Avalon (XX50) 2019-2022 Service & Repair Manual > Garage Door Opener System(for Gasoline Model): On-vehicle Inspection
ON-VEHICLE INSPECTION PROCEDURE 1. INSPECT GARAGE DOOR OPENER (a) Press each garage door opener ("HomeLink") switch and check that the ("HomeLink") indicator light turns on. If one or more of the garage door opener ("HomeLink") switches does not turn on the ("HomeLink") indicator light, check the co ...