REASSEMBLY PROCEDURE 1. INSTALL NO. 2 SIDE DEFROSTER NOZZLE
2. INSTALL NO. 1 SIDE DEFROSTER NOZZLE
3. INSTALL INSTRUMENT PANEL CUSHION (a) Clean the instrument panel safety pad sub-assembly surface. (1) Remove any remaining double-sided tape from the instrument panel safety pad sub-assembly. (2) Wipe off any tape adhesive residue with cleaner. (b) Remove the release paper from a new instrument panel cushion. HINT: After removing the release paper, keep the exposed adhesive free from foreign matter. (c) Install the instrument panel cushion as shown in the illustration. 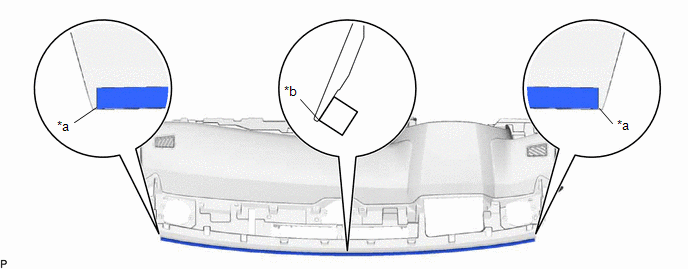
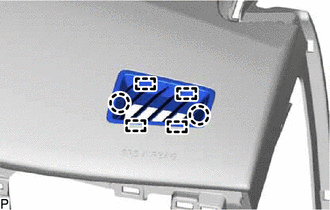
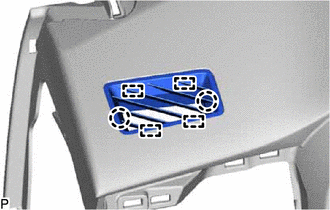
4. INSTALL NO. 1 INSTRUMENT PANEL PIN (a) Install the 4 No. 1 instrument panel pins with the 4 screws <C>. 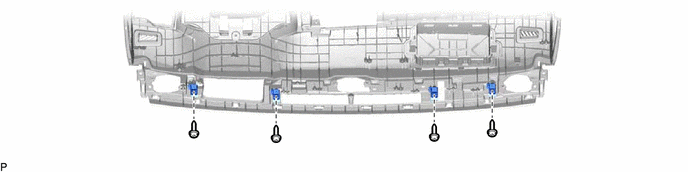 5. INSTALL NO. 2 METER BRACKET SUB-ASSEMBLY (w/ Headup Display)
6. INSTALL NO. 1 METER BRACKET SUB-ASSEMBLY
7. INSTALL NAVIGATION ANTENNA ASSEMBLY WITH BRACKET Click here
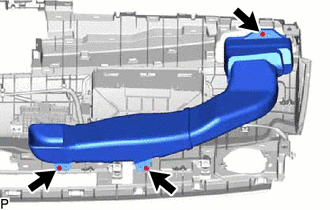
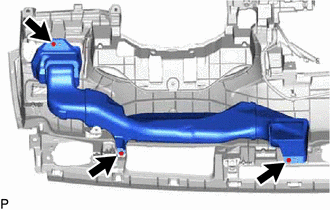
8. INSTALL NO. 4 ANTENNA CORD SUB-ASSEMBLY Click here 9. INSTALL NO. 3 HEATER TO REGISTER DUCT SUB-ASSEMBLY
10. INSTALL NO. 1 HEATER TO REGISTER DUCT SUB-ASSEMBLY
11. INSTALL METER MIRROR SUB-ASSEMBLY (w/ Headup Display) Click here
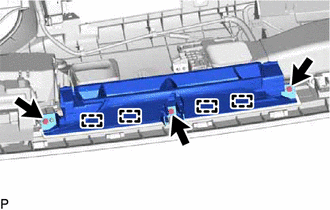
12. INSTALL DEFROSTER NOZZLE ASSEMBLY
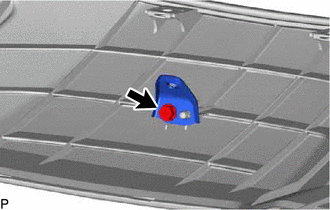
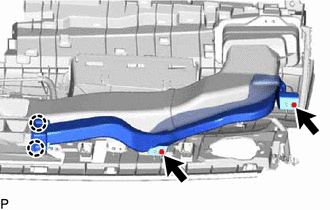
(b) Install the defroster nozzle assembly with the 3 screws <C>. 13. INSTALL NO. 2 SIDE DEFROSTER NOZZLE DUCT
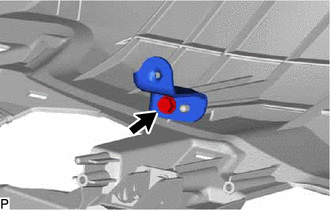
(b) Install the No. 2 side defroster nozzle duct with the 2 screws <C>. 14. INSTALL NO. 1 SIDE DEFROSTER NOZZLE DUCT
(b) Install the No. 1 side defroster nozzle duct with the screw <C>. 15. INSTALL INSTRUMENT PANEL PASSENGER AIRBAG ASSEMBLY Click here
|
Toyota Avalon (XX50) 2019-2022 Service & Repair Manual > Electric Parking Brake Actuator: Removal
REMOVAL CAUTION / NOTICE / HINT HINT: Use the same procedure for the RH side and LH side. The following procedure is for the LH side. PROCEDURE 1. PRECAUTION Click here 2. RELEASE PARKING BRAKE (a) Move the shift lever to P. (b) Turn the engine switch (for Gasoline Model) or power switch (for HV Mod ...