DISASSEMBLY CAUTION / NOTICE / HINT CAUTION: Wear protective gloves. Sharp areas on the parts may injure your hands. PROCEDURE 1. REMOVE REAR SEAT SHOULDER BELT GUIDE LH (for LH Side)
(b) Disengage the guide to remove the rear seat shoulder belt guide LH. 2. REMOVE REAR SIDE SEATBACK COVER SUB-ASSEMBLY LH (for LH Side)
(c) Remove the rear side seatback cover sub-assembly LH from the rear side seatback frame sub-assembly LH as shown in the illustration. 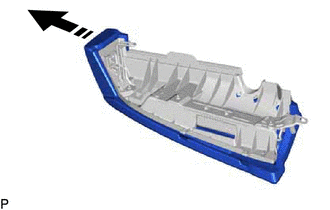
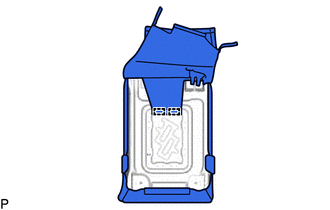
3. REMOVE REAR SEAT AIRBAG ASSEMBLY LH (for LH Side) Click here 4. REMOVE REAR SEAT SHOULDER BELT GUIDE RH (for RH Side) HINT: Use the same procedure as for the LH side. 5. REMOVE REAR SIDE SEATBACK COVER SUB-ASSEMBLY RH (for RH Side) HINT: Use the same procedure as for the LH side. 6. REMOVE REAR SEAT AIRBAG ASSEMBLY RH (for RH Side) HINT: Use the same procedure as for the LH side. 7. REMOVE REAR SEATBACK UPPER LOCK BEZEL (for LH Side)
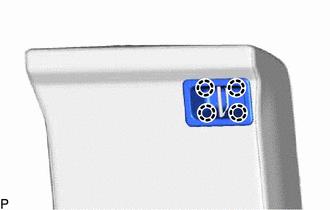
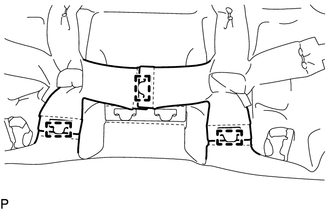
8. REMOVE SEPARATE TYPE REAR SEATBACK COVER WITH PAD (for LH Side) (a) Open the 2 fasteners as shown in the illustration. 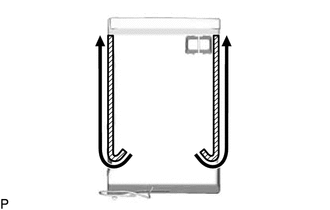
(c) Disengage the 2 claws and remove the 2 rear seat headrest supports as shown in the illustration. 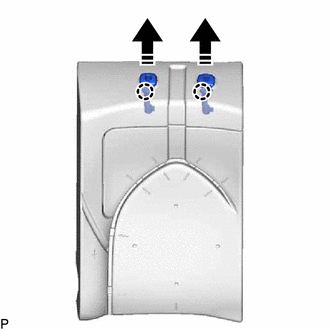
(d) Remove the separate type rear seatback cover with pad from the rear seatback frame sub-assembly LH as shown in the illustration. 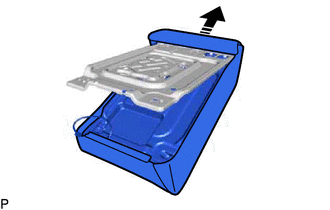
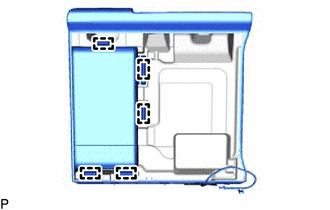
9. REMOVE SEPARATE TYPE REAR SEATBACK COVER (for LH Side) (a) Remove the 6 hog rings. 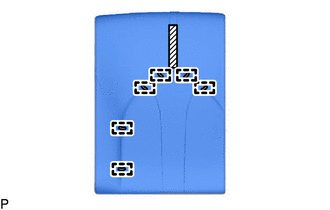
(b) Disengage the fastener and remove the separate type rear seatback cover from the separate type rear seatback pad. 10. REMOVE REAR SEATBACK HEATER ASSEMBLY (for LH Side) Click here
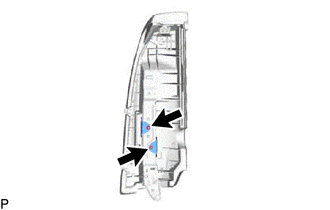
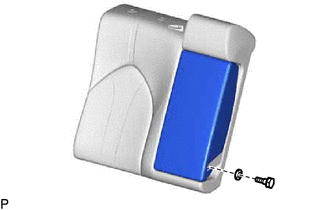
11. REMOVE REAR SEAT CENTER ARMREST ASSEMBLY (for RH Side)
(b) Disengage the pin and remove the rear seat center armrest assembly as shown in the illustration. 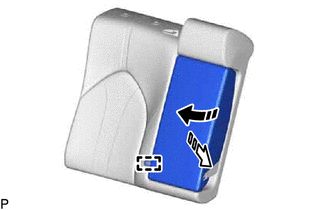
(c) Remove the bush as shown in the illustration. 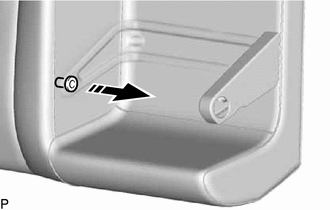
12. REMOVE REAR SEATBACK HINGE COVER (for RH Side) (a) Remove the rear seatback hinge cover as shown in the illustration. 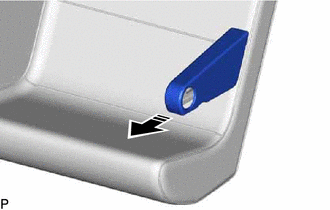
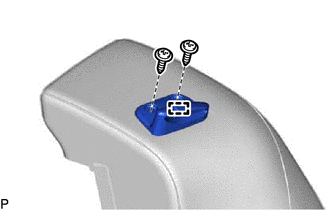
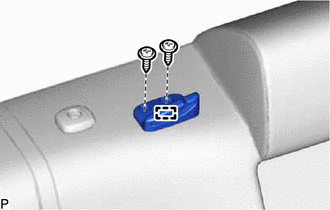
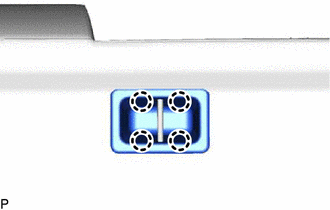
13. REMOVE REAR SEAT CENTER SHOULDER BELT GUIDE (for RH Side)
(b) Disengage the guide to remove the rear seat center shoulder belt guide. 14. REMOVE REAR SEATBACK UPPER LOCK BEZEL (for RH Side)
15. REMOVE SEPARATE TYPE REAR SEATBACK COVER WITH PAD (for RH Side) (a) Open the 2 fasteners as shown in the illustration. 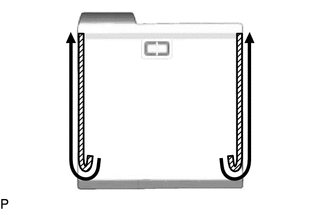
(d) Disengage the 2 claws and remove the 2 rear seat headrest supports as shown in the illustration. 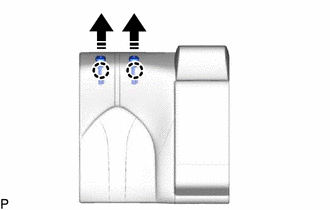
(e) Remove the separate type rear seatback cover with pad from the rear seatback frame sub-assembly RH as shown in the illustration. 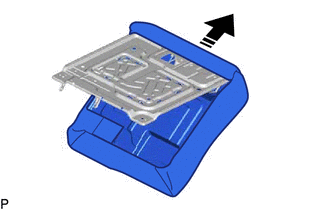
16. REMOVE SEPARATE TYPE REAR SEATBACK COVER (for RH Side)
(b) Remove the 6 hog rings. 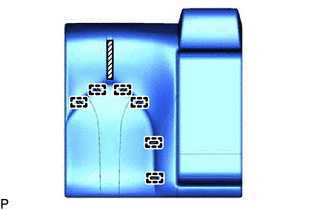
(c) Disengage the fastener and remove the separate type rear seatback cover from the separate type rear seatback pad. 17. REMOVE REAR SEATBACK HEATER ASSEMBLY (for RH Side) Click here
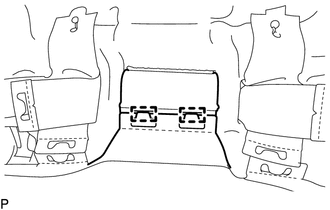
18. REMOVE CHILD RESTRAINT SEAT COVER (a) Disengage the 2 claws and 2 guides to remove the child restraint seat cover as shown in the illustration. 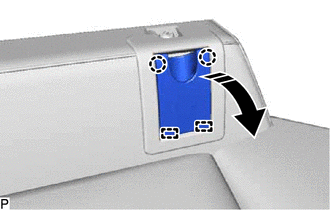
HINT: Use the same procedure for all of the child restraint seat covers. 19. REMOVE CHILD RESTRAINT SEAT BASE COVER (a) Remove the screw. 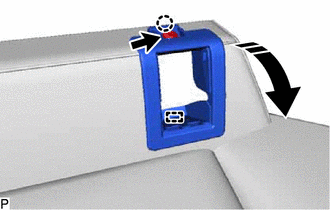
(b) Disengage the claw and guide to remove the child restraint seat base cover as shown in the illustration. HINT: Use the same procedure for all of the child restraint seat base covers. 20. REMOVE BENCH TYPE REAR SEAT CUSHION COVER
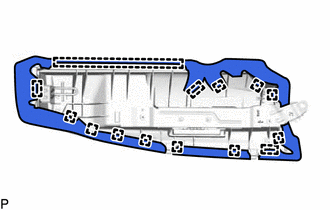
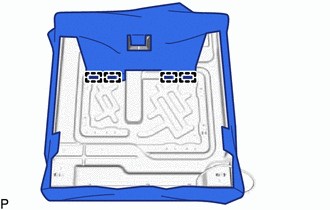
(c) for Gasoline Model: (1) Remove the 23 hog rings. 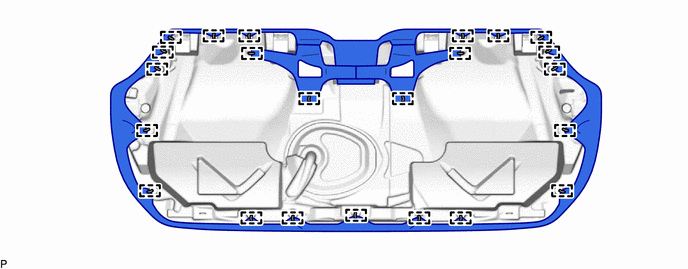 (2) Disengage the 4 fasteners. 
(3) Remove the 22 hog rings. 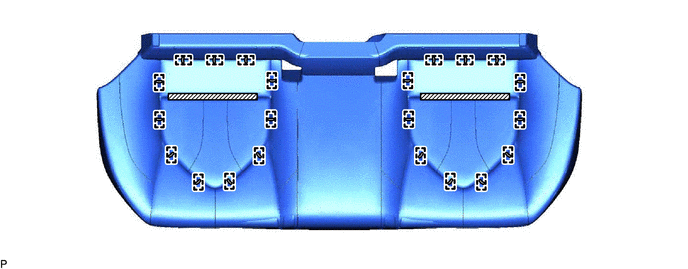
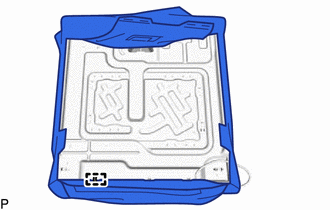
(4) Disengage the 2 fasteners to remove the bench type rear seat cushion cover from the rear seat cushion pad sub-assembly. (d) for HV Model: (1) Remove the 23 hog rings. 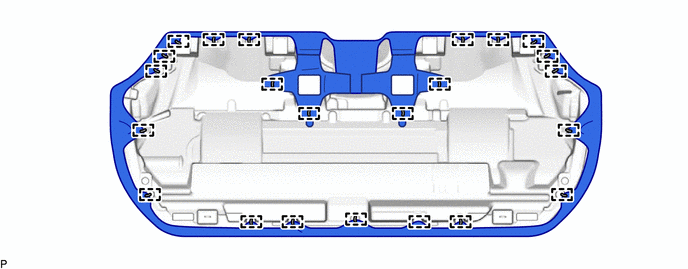 (2) Disengage the 4 fasteners. 
(3) Remove the 22 hog rings. 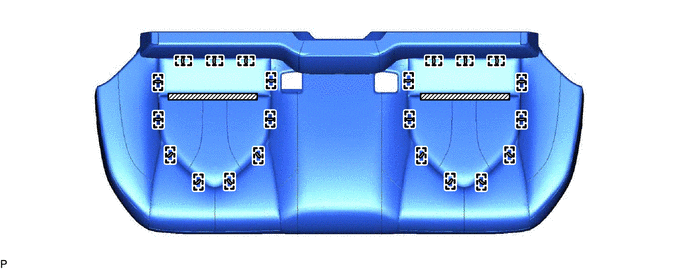
(4) Disengage the 2 fasteners to remove the bench type rear seat cushion cover from the rear seat cushion pad sub-assembly. 21. REMOVE REAR SEAT CUSHION HEATER ASSEMBLY (w/ Seat Heater System) Click here
|
Toyota Avalon (XX50) 2019-2022 Service & Repair Manual > Refrigerant: Precaution
PRECAUTION PRECAUTIONS FOR REFRIGERANT HFO-1234yf (R1234yf) (a) Compatibility (1) The parts used in the refrigerant cycle, the compressor oil, etc. of an HFO-1234yf (R1234yf) system are not compatible with a conventional HFC-134a (R134a) system. (b) HFO-1234yf (R1234yf) Refrigerant (1) Always use HF ...