INSTALLATION CAUTION / NOTICE / HINT HINT: If the front bumper has been damaged or deformed due to an accident or contact with an object, etc., or the bumper installation area of the vehicle body has been repaired, it is necessary to perform millimeter wave radar sensor adjustment. Click here PROCEDURE 1. INSTALL FRONT BUMPER ASSEMBLY (a) Move the front bumper assembly into position and engage the 2 guides as shown in the illustration. 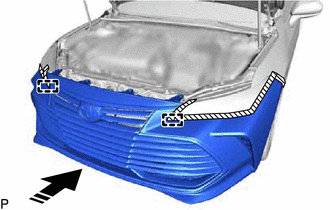
(b) Install the 4 bolts. (c) w/ Intuitive Parking Assist System: (1) Connect the connector. (d) Connect the connector. (e) Engage the 4 claws as shown in the illustration. HINT: Use the same procedure for the RH side and LH side. 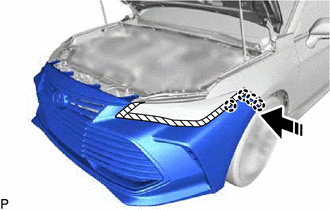
(f) Install the 8 screws. (g) Install the screw. HINT: Use the same procedure for the RH side and LH side. (h) Install the front bumper assembly with the 2 clips. HINT: Use the same procedure for the RH side and LH side. 2. INSTALL COOL AIR INTAKE DUCT SEAL (a) Engage the guide as shown in the illustration. 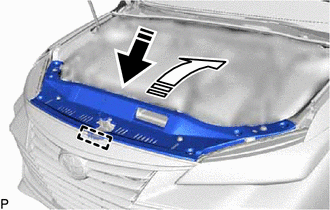
(b) Install the cool air intake duct seal with the 7 clips. 3. ADJUST FRONT TELEVISION CAMERA ASSEMBLY (w/ Panoramic View Monitor System) for HV Model: Click here for Gasoline Model: Click here 4. PERFORM CALIBRATION (w/ Intelligent Clearance Sonar System) for HV Model: Click here for Gasoline Model: Click here 5. ADJUST HEADLIGHT AIMING HINT: Perform this procedure only when the front bumper reinforcement has been replaced. Click here |
Toyota Avalon (XX50) 2019-2022 Service & Repair Manual > Audio And Visual System(for Hv Model): Steering Pad Switch Circuit
DESCRIPTION This circuit sends an operation signal from the steering pad switch assembly to the radio and display receiver assembly. If there is an open in the circuit, the audio system cannot be operated using the steering pad switch assembly. If there is a short in the circuit, the same condition ...


