REASSEMBLY PROCEDURE 1. INSTALL FRONT BUMPER REINFORCEMENT (a) Install the front bumper reinforcement with the 8 bolts. 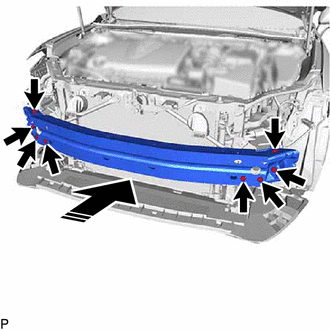
Torque: 43 N·m {438 kgf·cm, 32 ft·lbf}
(c) Install the headlight assembly LH. Click here
(d) Install the headlight assembly RH. HINT: Use the same procedure as for the LH side. 2. INSTALL FRONT BUMPER ENERGY ABSORBER (a) Engage the 2 guides to install the front bumper energy absorber as shown in the illustration. 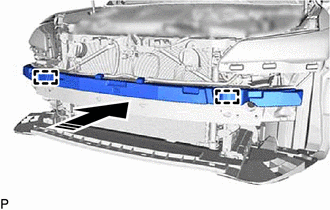
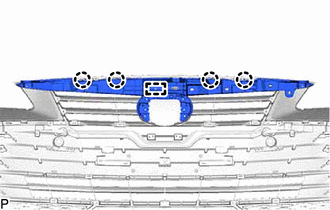
3. INSTALL NO. 2 FRONT BUMPER ENERGY ABSORBER (a) Engage the 4 guides to install the No. 2 front bumper energy absorber as shown in the illustration. 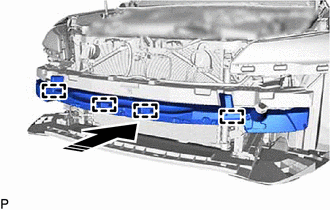
4. INSTALL FRONT BUMPER SIDE RETAINER LH (a) Engage the claw to temporarily install the front bumper side retainer LH as shown in the illustration. 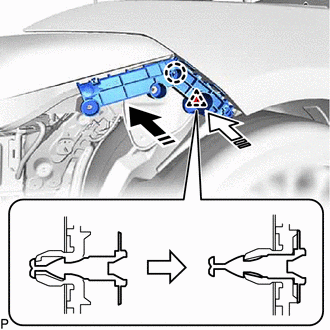
(b) Engage the clip as shown in the illustration. (c) Install the front bumper side retainer LH with the bolt (A) and bolt (B). 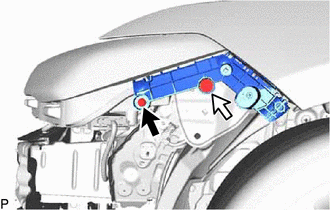
Torque: 5.4 N·m {55 kgf·cm, 48 in·lbf} 5. INSTALL FRONT BUMPER SIDE RETAINER RH HINT: Use the same procedure as for the LH side. 6. INSTALL FRONT BUMPER MOULDING (for Bar Type Radiator Grille) (a) Engage the 20 guides and 18 claws. 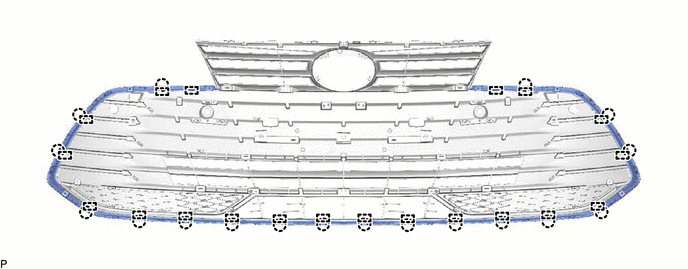
7. INSTALL RADIATOR GRILLE (for Bar Type Radiator Grille)
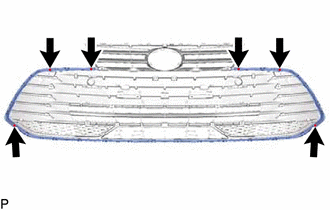
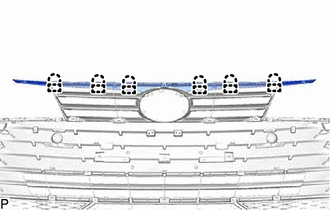
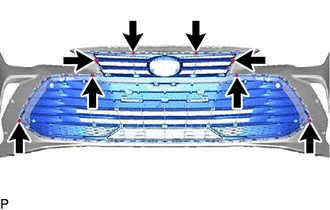
8. INSTALL LOWER RADIATOR GRILLE SUB-ASSEMBLY (for Bar Type Radiator Grille) (a) Engage the 5 guides and 23 claws. 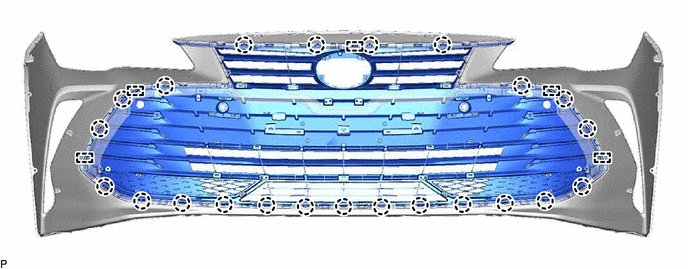
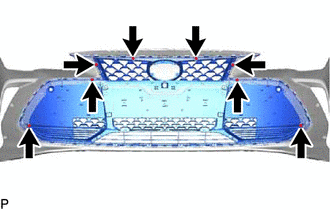
9. INSTALL LOWER RADIATOR GRILLE SUB-ASSEMBLY (for Mesh Type Radiator Grille) (a) Engage the 3 guides and 23 claws. 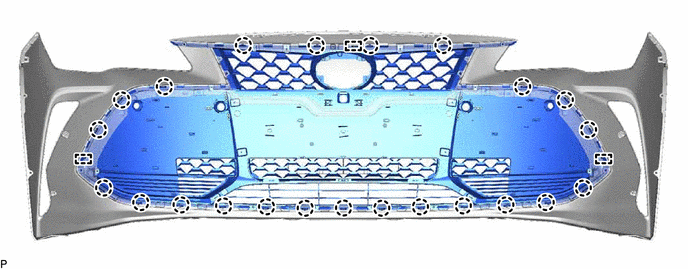
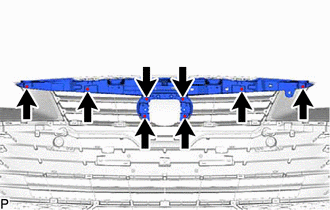
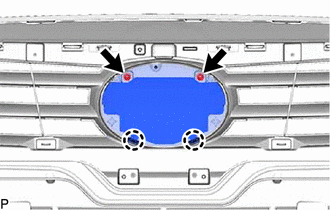
10. INSTALL RADIATOR GRILLE SUB-ASSEMBLY
(c) Install the radiator grille sub-assembly with the 2 clips and 3 screws. 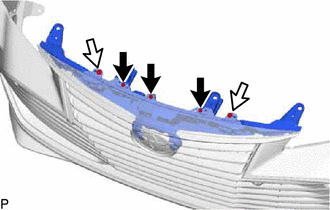
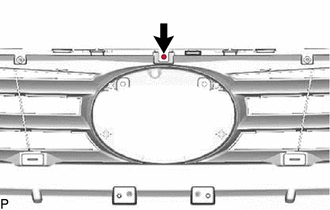
11. INSTALL RADIATOR GRILLE EMBLEM ASSEMBLY
(b) Install the radiator grille emblem assembly with the 2 screws. 12. INSTALL HOOD TO FRONT END PANEL SEAL HINT: When installing the hood to front end panel seal, heat the front bumper cover using a heat light. Heating Temperature
CAUTION:
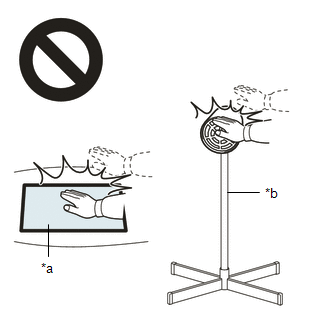
NOTICE: Do not heat the front bumper cover excessively. (a) Clean the front bumper cover surface. (1) Using a heat light, heat the front bumper cover surface. (2) Remove any remaining double-sided tape from the front bumper cover. (3) Wipe off any tape adhesive residue with cleaner. (b) Remove the release paper from a new hood to front end panel seal. HINT: After removing the release paper, keep the exposed adhesive free from foreign matter. (c) Attach the double-sided tape as shown in the illustration. 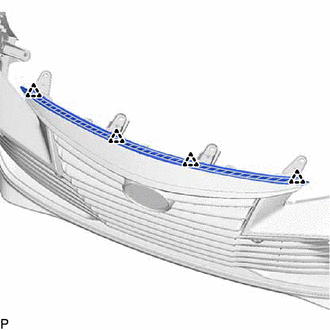
HINT: Press the hood to front end panel seal firmly to install it. (d) Engage the 4 clips to install the hood to front end panel seal. 13. INSTALL MILLIMETER WAVE RADAR SENSOR ASSEMBLY Click here 14. INSTALL AIR INTAKE DUCT LH (a) Engage the 4 guides as shown in the illustration. 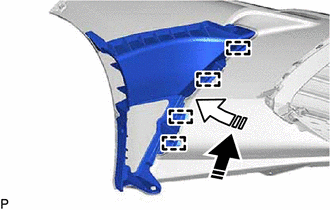
(b) Install the air intake duct LH with the clip and 2 screws. 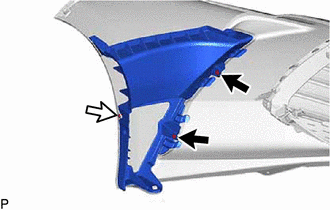
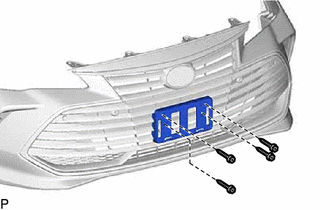
15. INSTALL AIR INTAKE DUCT RH HINT: Use the same procedure as for the LH side. 16. INSTALL FRONT LICENSE PLATE BRACKET SUB-ASSEMBLY (for Bar Type Radiator Grille) (a) Temporarily install the front license plate bracket sub-assembly as shown in the illustration. 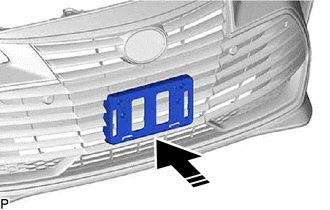
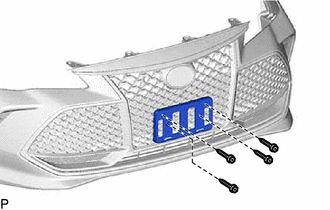
17. INSTALL FRONT LICENSE PLATE BRACKET SUB-ASSEMBLY (for Mesh Type Radiator Grille) (a) Temporarily install the front license plate bracket sub-assembly as shown in the illustration. 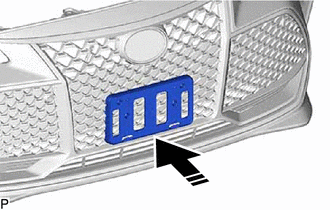
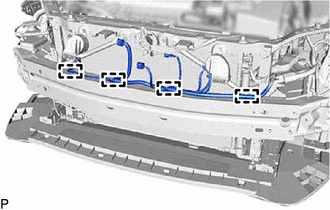
18. INSTALL NO. 4 ENGINE ROOM WIRE (w/ Intuitive Parking Assist System) (a) Engage the 11 clamps to install the No. 4 engine room wire. 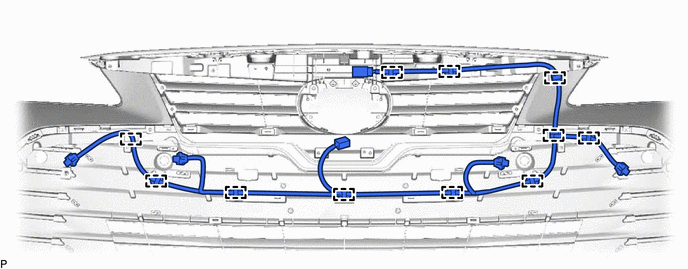 19. INSTALL FRONT CORNER ULTRASONIC SENSOR (w/ Intuitive Parking Assist System) Click here HINT: Use the same procedure for the RH side and LH side. 20. INSTALL FRONT CENTER ULTRASONIC SENSOR (w/ Intuitive Parking Assist System) Click here HINT: Use the same procedure for the RH side and LH side. 21. INSTALL FRONT TELEVISION CAMERA ASSEMBLY (w/ Panoramic View Monitor System) Click here |
Toyota Avalon (XX50) 2019-2022 Service & Repair Manual > Front Shock Absorber: Inspection
INSPECTION PROCEDURE 1. INSPECT FRONT SHOCK ABSORBER ASSEMBLY (a) Compress and extend the front shock absorber assembly rod 4 times or more. Standard: When compressed and extended at a constant speed, the stroke of the shock absorber rod is smooth with no abnormal resistance or sounds. When extended ...