REMOVAL CAUTION / NOTICE / HINT The necessary procedures (adjustment, calibration, initialization, or registration) that must be performed after parts are removed and installed, or replaced during front bumper assembly removal/installation are shown below. Necessary Procedure After Parts Removed/Installed/Replaced (for Gasoline Model)
HINT: If the front bumper has been damaged or deformed due to an accident or contact with an object, etc., or the bumper installation area of the vehicle body has been repaired, it is necessary to perform millimeter wave radar sensor adjustment. Click here PROCEDURE 1. REMOVE COOL AIR INTAKE DUCT SEAL
(b) Disengage the guide and remove the cool air intake duct seal as shown in the illustration. 
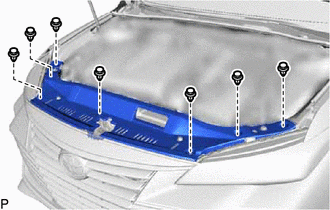
2. REMOVE FRONT BUMPER ASSEMBLY (a) Apply protective tape around the front bumper assembly as shown in the illustration. 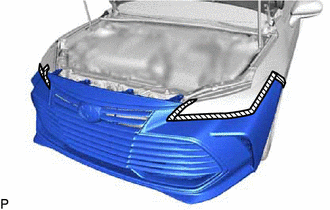
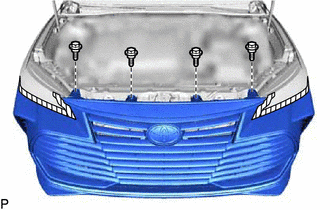
(e) Disengage the 4 claws as shown in the illustration. 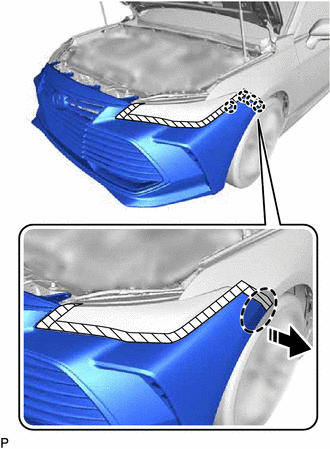
HINT: Use the same procedure for the RH side and LH side.
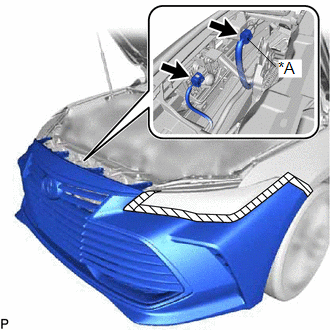
(g) w/ Intuitive Parking Assist System: (1) Disconnect the connector.
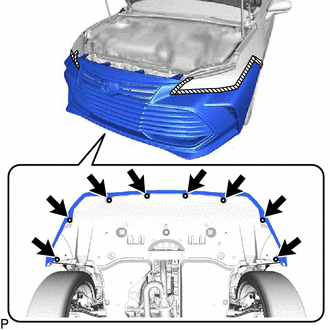
(i) Disengage the 2 guides to remove the front bumper assembly as shown in the illustration. 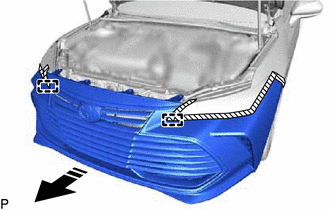
| |||||||||||||||||||||||||||||||||||||||||||||||||||||||||||||||||
Toyota Avalon (XX50) 2019-2022 Service & Repair Manual > Theft Deterrent System(for Gasoline Model): Horn Circuit
DESCRIPTION When the theft deterrent system is switched from the armed state to the alarm sounding state, the main body ECU (multiplex network body ECU) transmits a signal to cause the horns to sound at intervals of 0.4 seconds. WIRING DIAGRAM CAUTION / NOTICE / HINT NOTICE: Before replacing the mai ...

 for Initialization