COMPONENTS
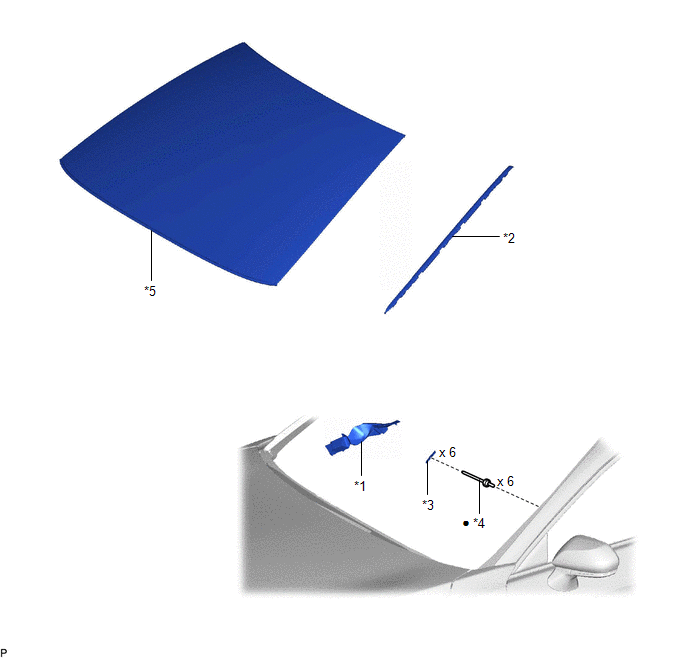
ILLUSTRATION
|
*1 | FRONT FENDER TO COWL SIDE SEAL |
*2 | LOWER WINDSHIELD OUTSIDE MOULDING |
|
*3 | NO. 1 WINDSHIELD OUTSIDE MOULDING CLIP |
*4 | NO. 3 WINDSHIELD OUTSIDE MOULDING CLIP |
|
*5 | WINDSHIELD GLASS SUB-ASSEMBLY |
- | - |
|
● | Non-reusable part |
- | - |
INSTALLATION
CAUTION / NOTICE / HINT
HINT:
PROCEDURE
1. INSTALL NO. 3 WINDSHIELD OUTSIDE MOULDING CLIP
HINT:
Perform the following procedure only when replacement of a No. 3 windshield outside moulding clip is necessary.
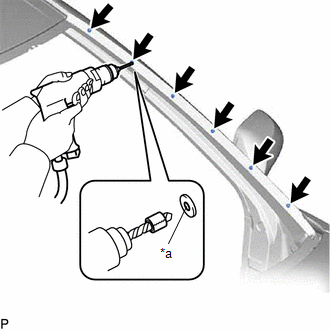
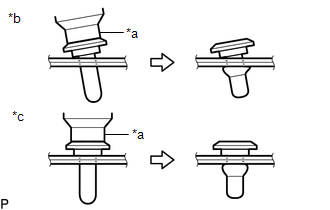
(a) Using a riveter with a nose piece, install 6 new No. 3 windshield outside moulding clips.
HINT:
If the mandrel of the No. 3 windshield outside moulding clip does not come off on the first operation of the riveter, slide the riveter forward on the mandrel and operate it again.
NOTICE:
|
*a |
Riveter |
|
*b |
Incorrect |
|
*c |
Correct |
|
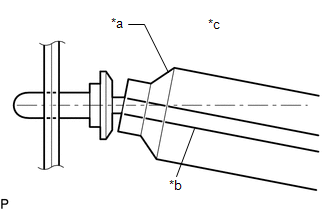
*a | Riveter |
|
*b | Mandrel |
|
*c | Incorrect |

(b) Install the windshield glass sub-assembly.
Click here 
2. INSTALL NO. 1 WINDSHIELD OUTSIDE MOULDING CLIP
HINT:
Perform the following procedure only when replacement of a No. 1 windshield outside moulding clip is necessary.
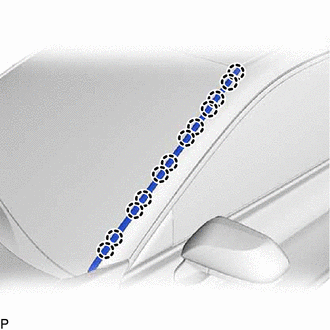
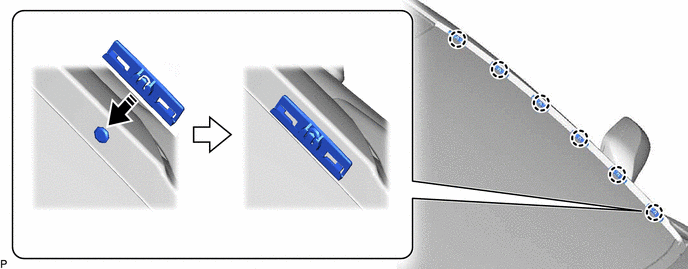
(a) Engage the 6 claws to install the 6 No. 1 windshield outside moulding clips as shown in the illustration.
 |
Install in this Direction |
- | - |
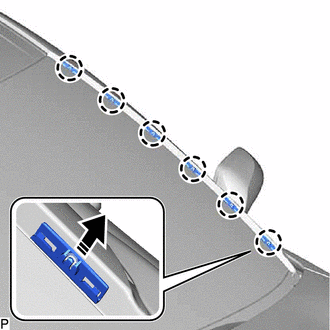
3. INSTALL LOWER WINDSHIELD OUTSIDE MOULDING
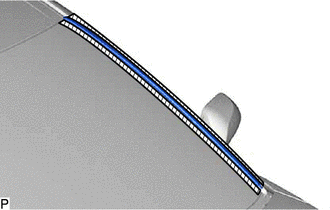
| (a) Engage the 12 claws to install the lower windshield outside moulding. |
|
4. INSTALL FRONT FENDER TO COWL SIDE SEAL
Click here
REMOVAL
CAUTION / NOTICE / HINT
HINT:
PROCEDURE
1. REMOVE FRONT FENDER TO COWL SIDE SEAL
Click here 
2. REMOVE LOWER WINDSHIELD OUTSIDE MOULDING
(a) Apply protective tape around the lower windshield outside moulding as shown in the illustration.
 | Protective Tape |
(b) Using a screwdriver with its tip wrapped with protective tape, disengage the 12 claws as shown in the illustration.
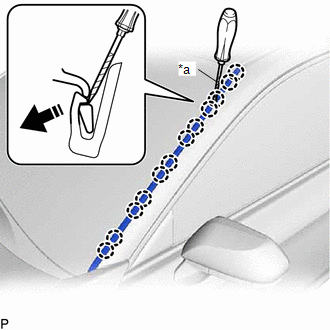
|
*a | Protective Tape |
 |
Remove in this Direction |
3. REMOVE NO. 1 WINDSHIELD OUTSIDE MOULDING CLIP
HINT:
Perform the following procedure only when replacement of a No. 1 windshield outside moulding clip is necessary.
(a) Disengage the 6 claws to remove the 6 No. 1 windshield outside moulding clips as shown in the illustration.
|
|
Remove in this Direction |
4. REMOVE NO. 3 WINDSHIELD OUTSIDE MOULDING CLIP
HINT:
Perform the following procedure only when replacement of a No. 3 windshield outside moulding clip is necessary.
(a) Remove the windshield glass sub-assembly.
Click here
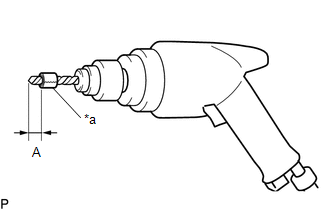
(b) Insert a 4.0 mm (0.157 in.) drill bit into a drill.
| (c) Tape the 4.0 mm (0.157 in.) drill bit 5.0 mm (0.197 in.) from the tip as shown in the illustration. Standard Measurement:
NOTICE: Tape the 4.0 mm (0.157 in.) drill bit to prevent the drill bit from going too deep. |
|
| (d) Lightly press the drill bit against the No. 3 windshield outside moulding clips to drill off the No. 3 windshield outside moulding clip flanges, and remove the 6 No. 3 windshield outside moulding clips. CAUTION: Be careful of the drilled No. 3 windshield outside moulding clips, as they may be hot. NOTICE:
|
|
(e) Using a vacuum cleaner, remove the No. 3 windshield outside moulding clip fragments and shavings from the drilled areas.
Toyota Avalon (XX50) 2019-2022 Service & Repair Manual > A25a-fxs Cooling: Radiator
Components COMPONENTS ILLUSTRATION *1 FRONT WHEEL OPENING EXTENSION PAD LH *2 FRONT WHEEL OPENING EXTENSION PAD RH *3 NO. 1 ENGINE UNDER COVER - - N*m (kgf*cm, ft.*lbf): Specified torque - - ILLUSTRATION *A Type A *B Type B *1 NO. 2 ENGINE UNDER COVER ASSEMBLY - - N*m (kgf*cm, ft.*lbf): Specified to ...