REMOVAL CAUTION / NOTICE / HINT HINT:
PROCEDURE 1. REMOVE FRONT FENDER TO COWL SIDE SEAL Click here 2. REMOVE LOWER WINDSHIELD OUTSIDE MOULDING (a) Apply protective tape around the lower windshield outside moulding as shown in the illustration. 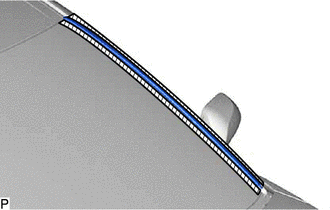
(b) Using a screwdriver with its tip wrapped with protective tape, disengage the 12 claws as shown in the illustration. 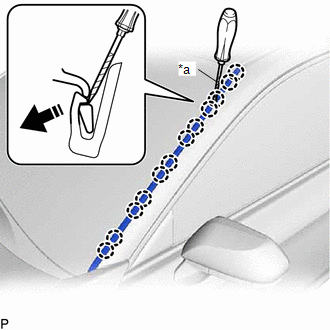
3. REMOVE NO. 1 WINDSHIELD OUTSIDE MOULDING CLIP HINT: Perform the following procedure only when replacement of a No. 1 windshield outside moulding clip is necessary. (a) Disengage the 6 claws to remove the 6 No. 1 windshield outside moulding clips as shown in the illustration. 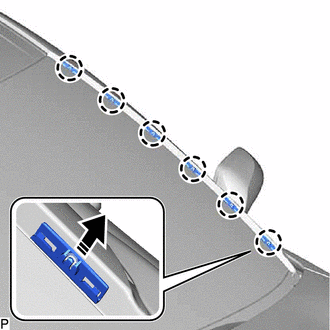
4. REMOVE NO. 3 WINDSHIELD OUTSIDE MOULDING CLIP HINT: Perform the following procedure only when replacement of a No. 3 windshield outside moulding clip is necessary. (a) Remove the windshield glass sub-assembly. Click here
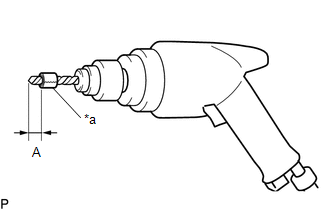
(b) Insert a 4.0 mm (0.157 in.) drill bit into a drill.
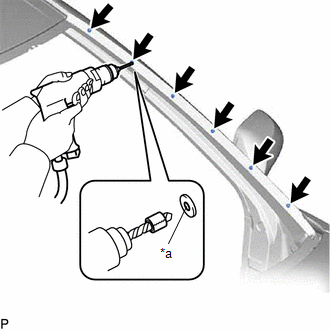
(e) Using a vacuum cleaner, remove the No. 3 windshield outside moulding clip fragments and shavings from the drilled areas. |
Toyota Avalon (XX50) 2019-2022 Service & Repair Manual > Shift Lever Position Sensor: Inspection
INSPECTION PROCEDURE 1. INSPECT SHIFT LEVER POSITION SENSOR (a) Measure the resistance according to the value(s) in the table below. Standard Resistance: Tester Connection Condition Specified Condition 7 (+B) - 3 (PR) Shift lever in P Below 1 Ω 7 (+B) - 4 (PNB) Below 1 Ω 7 (+B) - 8 (P) Below 1 Ω ...