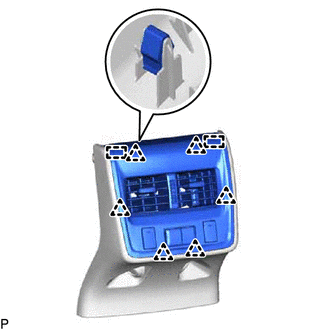
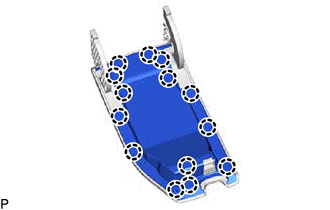
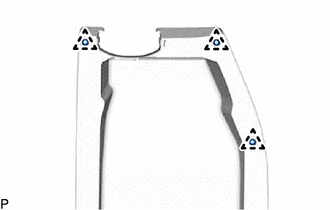
DISASSEMBLY PROCEDURE 1. REMOVE CONSOLE REAR END PANEL SUB-ASSEMBLY (a) Disengage the 4 claws and 4 clips as shown in the illustration. 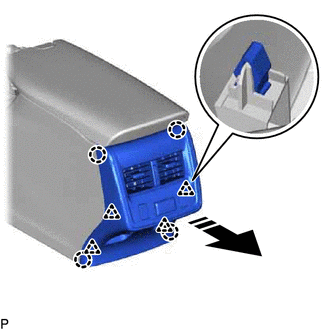
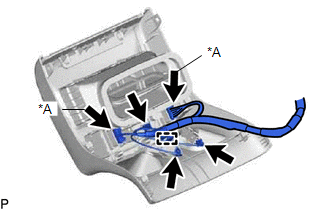
(c) Disengage the clamp to remove the console rear end panel sub-assembly. 2. REMOVE NO. 6 INTERIOR ILLUMINATION LIGHT SUB-ASSEMBLY Click here
3. REMOVE CONSOLE BOX ORNAMENT
4. REMOVE USB CHARGER SOCKET (for Rear Side) Click here
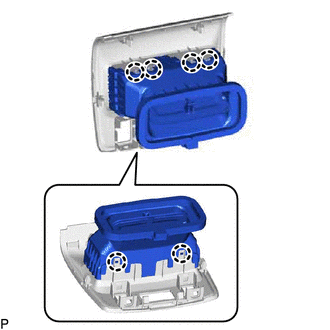
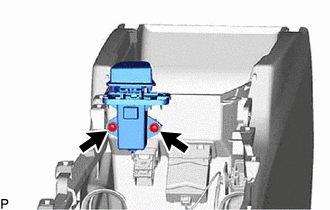
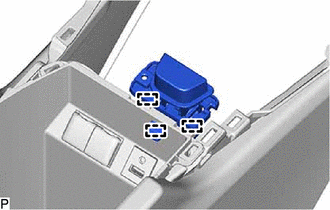
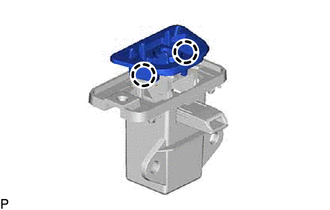
5. REMOVE SEAT HEATER SWITCH (w/ Seat Heater System) Click here 6. REMOVE CONSOLE BOX REGISTER ASSEMBLY
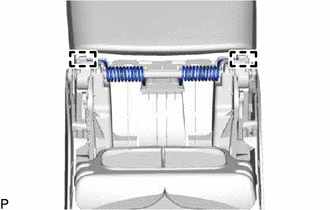
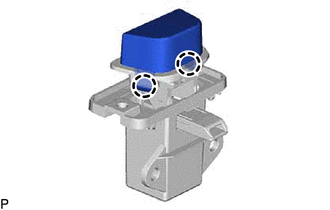
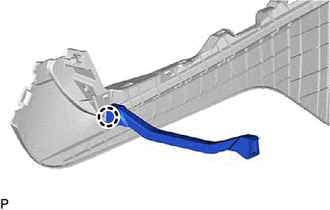
7. REMOVE REAR CONSOLE ARMREST ASSEMBLY
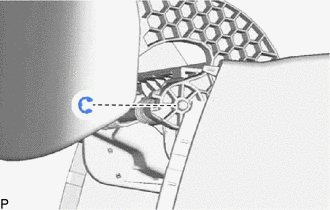
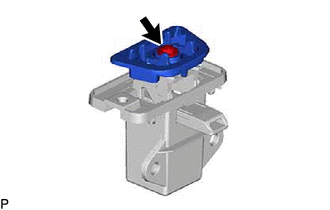
(c) Remove the console compartment door stopper pin as shown in the illustration. 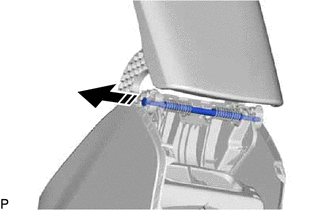
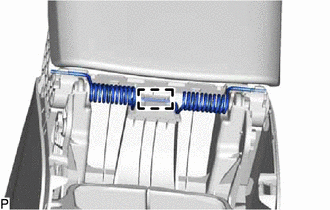
(e) Remove the rear console armrest assembly as shown in the illustration. 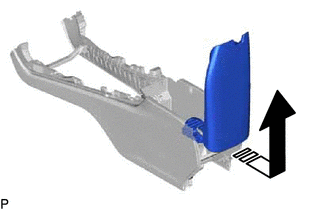
8. REMOVE CONSOLE COMPARTMENT DOOR PANEL
9. REMOVE CONSOLE COMPARTMENT DOOR CUSHION
10. REMOVE CONSOLE COMPARTMENT DOOR HINGE SUB-ASSEMBLY
11. REMOVE CONSOLE COMPARTMENT DOOR LOCK SUB-ASSEMBLY
12. REMOVE UPPER CONSOLE RETAINER
13. REMOVE CONSOLE COMPARTMENT DOOR HINGE RETAINER
14. REMOVE USB CHARGER SOCKET (for Front Side) Click here
15. REMOVE STEREO JACK ADAPTER ASSEMBLY Click here 16. REMOVE NO. 2 BOX SIDE PANEL (a) Disengage the 4 claws as shown in the illustration. 
(b) Using a moulding remover, disengage the 5 claws and 5 guides as shown in the illustration to remove the No. 2 box side panel. 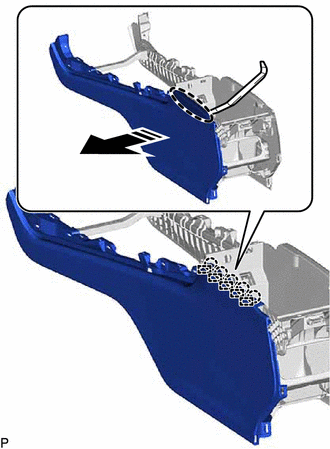
17. REMOVE CONSOLE BOX RETAINER
18. REMOVE NO. 1 BOX SIDE PANEL (a) Disengage the 3 claws as shown in the illustration. 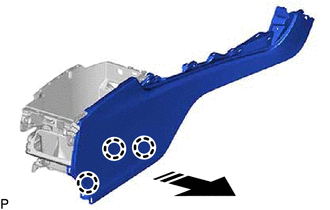
(b) Using a moulding remover, disengage the 5 claws and 5 guides as shown in the illustration to remove the No. 1 box side panel. 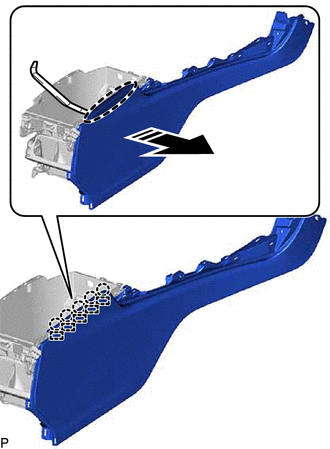
19. REMOVE NO. 2 CONSOLE BOX SUPPORT (a) Disengage the 2 claws and guide as shown in the illustration to remove the No. 2 console box support. 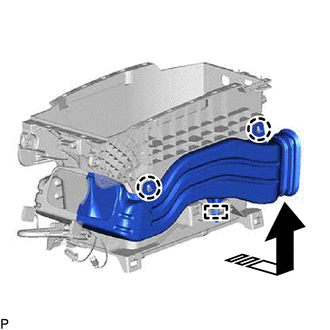
20. REMOVE NO. 3 CONSOLE BOX DUCT (a) Disengage the 2 claws and guide as shown in the illustration to remove the No. 3 console box duct. 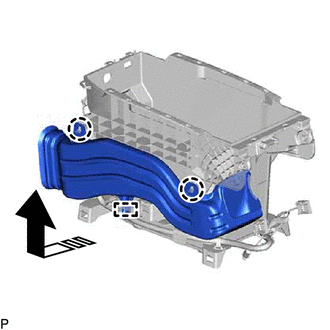
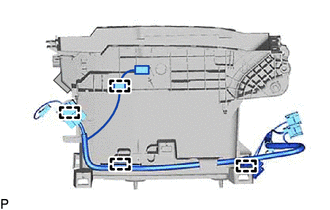
21. REMOVE NO. 5 INTERIOR ILLUMINATION LIGHT SUB-ASSEMBLY Click here 22. REMOVE CONSOLE BOX WIRE
|
Toyota Avalon (XX50) 2019-2022 Service & Repair Manual > Electronically Controlled Brake System(for Gasoline Model): Steering Angle Sensor Output (C1434)
DESCRIPTION The skid control ECU (brake actuator assembly) receives signals from the steering angle sensor via CAN communication. HINT: If there is a malfunction in the bus lines between the steering angle sensor and the CAN communication system, DTC U0126 (Lost Communication With Steering Angle Sen ...