PRECAUTION HINT:
SEAT COVER SET (a) Align the center cutout of the pad with the V-point of the cover. 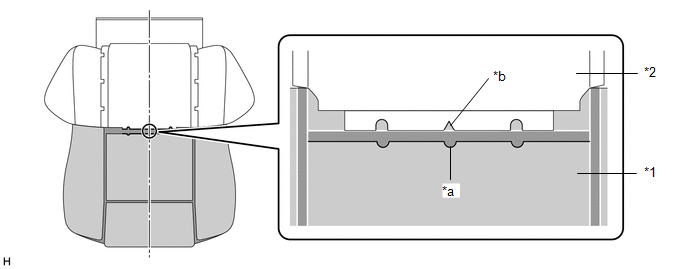
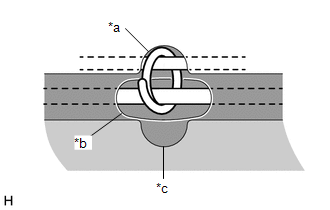
INSTALL HOG RING (a) Using hog ring pliers, bend the hog rings into the shape shown in the illustration. 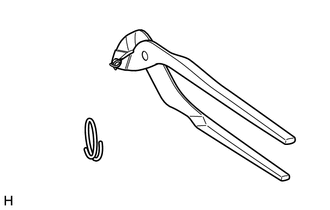 HINT: Make sure to bend the hog rings into the proper shape. Wrinkles will form if improperly shaped hog rings are used. (b) Install the hog rings in the order of the wires shown in the illustration. HINT:
(c) After installing the hog rings, hold the seam allowance on both ends of the cover and pull to match the pad and cover installation areas. HINT: If the cover is not matched to the pad, wrinkles will form. 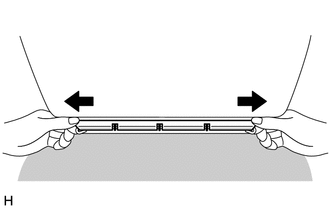 (d) Push the cover seam allowance securely into the groove in the pad. HINT: Make sure to completely push the seam allowance into the groove. Wrinkles will form if any of the seam allowance is outside the groove. 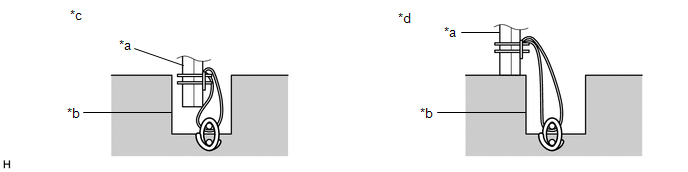
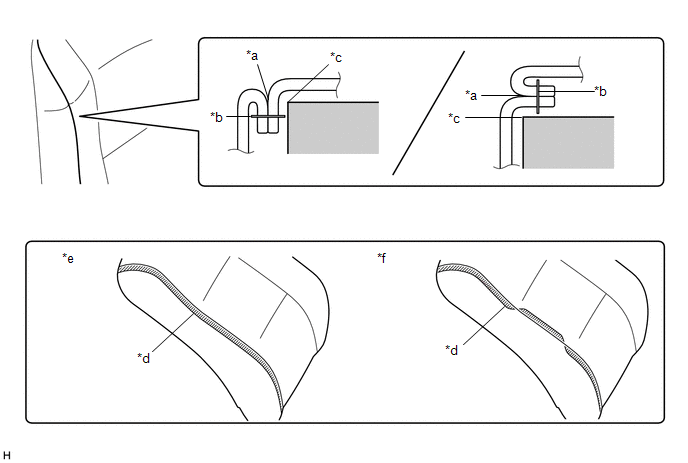
INSTALL WEBBING (w/ Airbag) (a) Pass the webbing through the pad hole, and then stretch the webbing so there are no wrinkles. 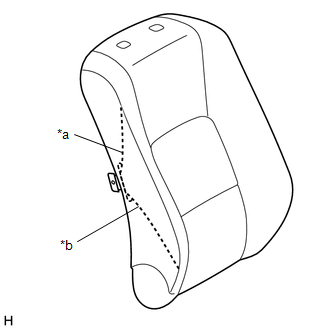
NOTICE: If there are wrinkles in the webbing, wrinkles will appear on the surface of the cover. CHECK COVER POSITION (a) Fold the cover back as shown in the illustration and check that the cover V-points and the pad mark-off lines are approximately aligned. 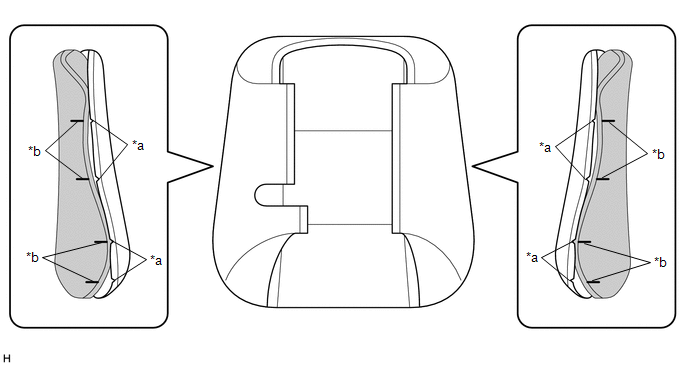
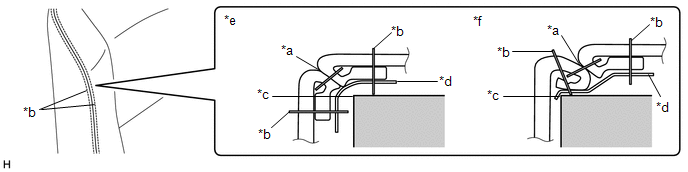
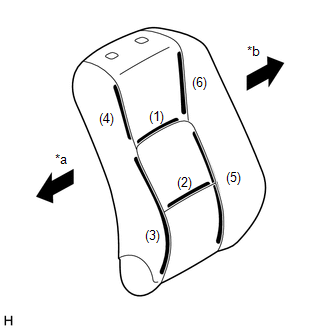
INSTALL COVER (a) Align the cover of the seatback with the center of the seatback pad and the cover of the seat cushion with the center of the seat cushion pad. Afterward, install the covers starting from the vehicle exterior and working toward the vehicle interior. (b) While removing wrinkles by hand as shown in the illustration, install the seatback cover by starting from the bottom and working toward the shoulders, and then install the seat cushion cover by starting from the front and working toward the rear. 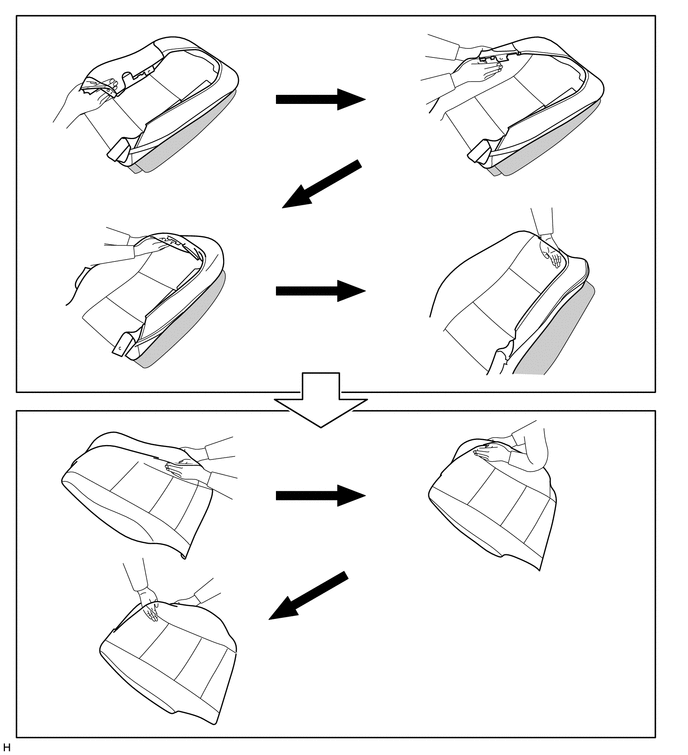
HINT:
(c) Align the cover seam line with the edges of the pad. 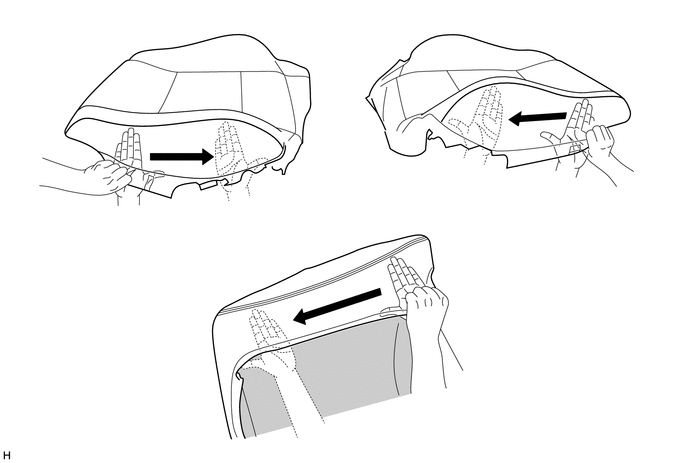
HINT:
(d) Push the cover seam allowance securely into the groove in the pad. HINT: Make sure to completely push the seam allowance into the groove. Wrinkles will form if any of the seam allowance is outside the groove. 
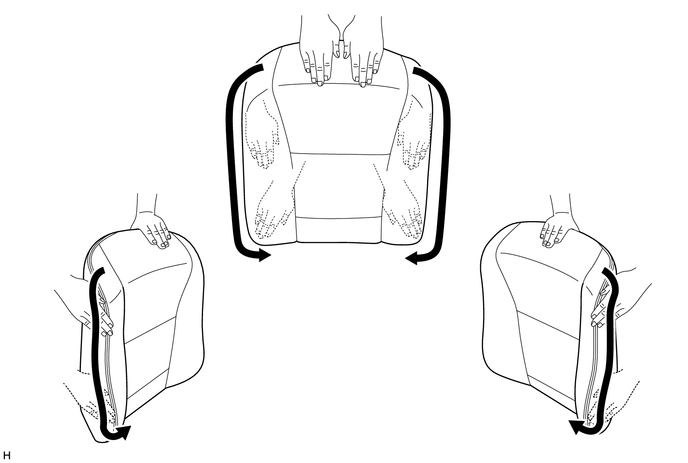
REMOVE WRINKLES (a) After installing the cover with pad to the seat frame, use your fingers to trace the seam line of each part and remove wrinkles. NOTICE: If there are wrinkles in the webbing, wrinkles will appear on the surface of the cover. 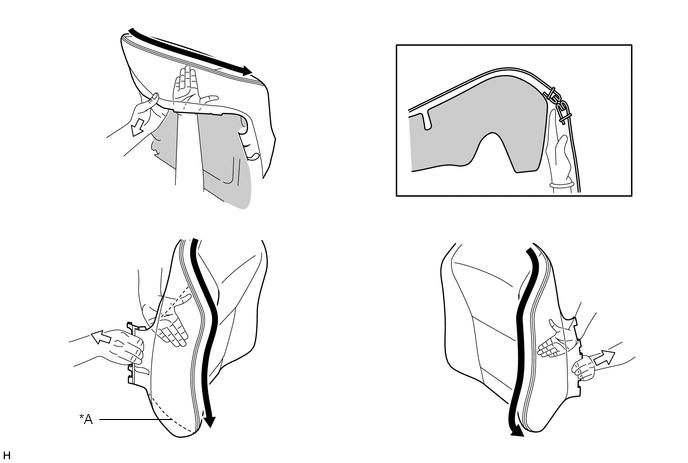
CHECKS TO PERFORM AFTER WORK IS FINISHED (a) Smooth the cover as shown in the illustration and make sure that there are no wrinkles. HINT:
 |
Toyota Avalon (XX50) 2019-2022 Service & Repair Manual > Power Tilt And Power Telescopic Steering Column System(for Gasoline Model): Terminals Of Ecu
TERMINALS OF ECU MULTIPLEX TILT AND TELESCOPIC ECU *a Component with harness connected (Multiplex Tilt and Telescopic ECU) - - (a) Measure the voltage and resistance according to the value(s) in the table below. HINT: Inspect the connectors from the back side while the connectors are connected. Term ...