REMOVAL CAUTION / NOTICE / HINT The necessary procedures (adjustment, calibration, initialization or registration) that must be performed after parts are removed and installed, or replaced during hybrid battery thermistor removal/installation are shown below. Necessary Procedures After Parts Removed/Installed/Replaced
CAUTION:
NOTICE: After turning the power switch off, waiting time may be required before disconnecting the cable from the negative (-) auxiliary battery terminal. Therefore, make sure to read the disconnecting the cable from the negative (-) auxiliary battery terminal notices before proceeding with work. Click here PROCEDURE 1. REMOVE HV BATTERY Click here 2. REMOVE UPPER HV BATTERY COVER SUB-ASSEMBLY Click here
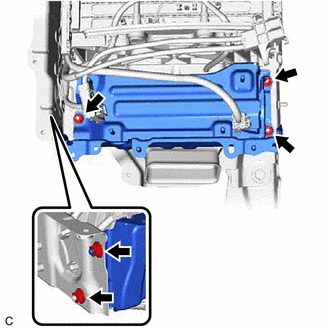
3. REMOVE HV BATTERY JUNCTION BLOCK ASSEMBLY Click here 4. REMOVE NO. 2 HYBRID BATTERY SHIELD SUB-ASSEMBLY CAUTION: Be sure to wear insulated gloves and protective goggles.
(b) Pull back the rear No. 1 HV battery shield and remove the No. 2 hybrid battery shield sub-assembly from the HV battery. 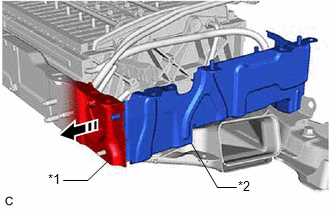
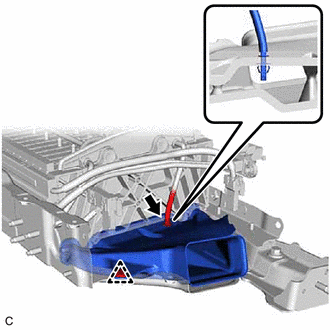
HINT: Pull back the rear No. 1 HV battery shield until it is separated from the stud bolt of the No. 2 hybrid battery shield sub-assembly. 5. REMOVE NO. 1 HV BATTERY INTAKE DUCT LH CAUTION: Be sure to wear insulated gloves and protective goggles.
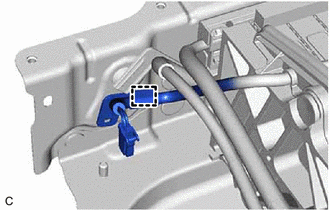
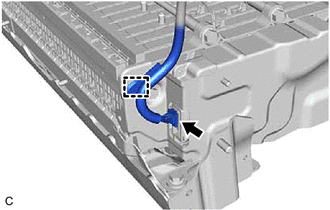
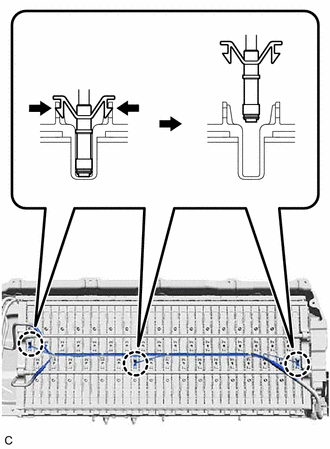
(b) Disengage the claw of hybrid battery thermistor (sensor portion) and remove the No. 1 HV battery intake duct LH. 6. REMOVE HYBRID BATTERY THERMISTOR CAUTION: Be sure to wear insulated gloves and protective goggles.
(d) Disconnect the battery voltage sensor connector.
| |||||||||||||||||||||||||||||||||||||||||||||||||||
Toyota Avalon (XX50) 2019-2022 Service & Repair Manual > Automatic Transaxle Assembly: Removal
REMOVAL CAUTION / NOTICE / HINT The necessary procedures (adjustment, calibration, initialization, or registration) that must be performed after parts are removed, installed, or replaced during automatic transaxle assembly removal/installation are shown below. Necessary Procedures After Parts Remove ...