REMOVAL PROCEDURE 1. REMOVE FRONT WHEEL LH Click here 2. REMOVE FRONT WHEEL OPENING EXTENSION PAD LH HINT: Use the same procedure as for the RH side. Click here
3. REMOVE FRONT FENDER SPLASH SHIELD SUB-ASSEMBLY LH HINT: Use the same procedure as for the RH side. Click here
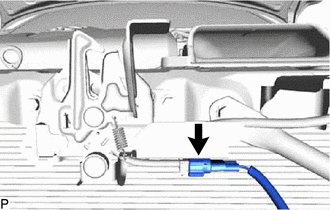
4. REMOVE COOL AIR INTAKE DUCT SEAL Click here 5. REMOVE HOOD LOCK ASSEMBLY
6. REMOVE FRONT DOOR SCUFF PLATE LH Click here
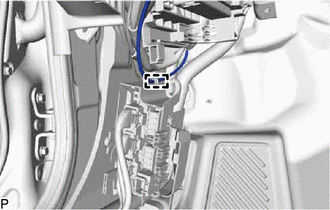
7. REMOVE COWL SIDE TRIM SUB-ASSEMBLY LH Click here 8. REMOVE NO. 1 INSTRUMENT PANEL UNDER COVER SUB-ASSEMBLY Click here 9. DISCONNECT HOOD LOCK CONTROL LEVER SUB-ASSEMBLY Click here 10. REMOVE HOOD LOCK CONTROL LEVER SUB-ASSEMBLY
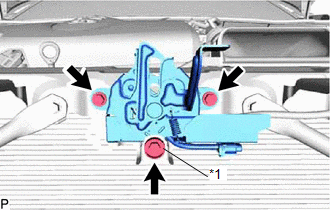
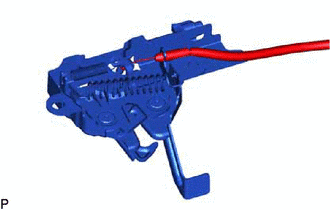
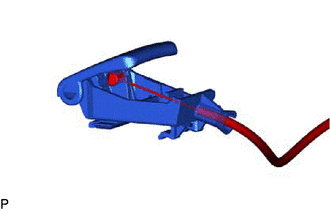
11. REMOVE HOOD LOCK CONTROL CABLE ASSEMBLY
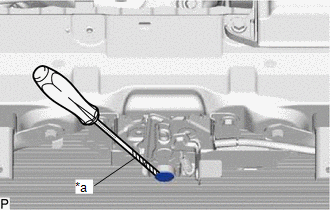
(b) Using a screwdriver, disengage the 5 clamps and grommet as shown in the illustration. 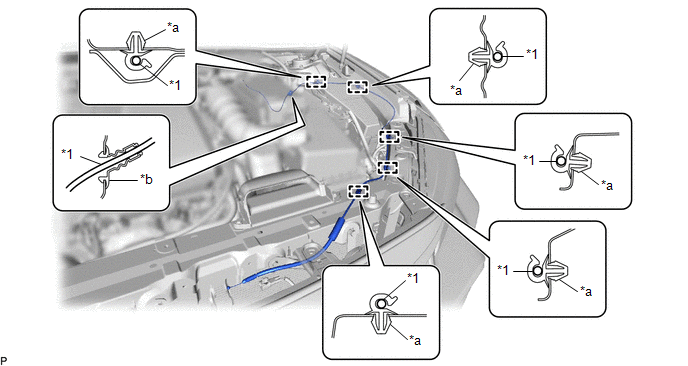
HINT: Tape the screwdriver tip before use. (c) Pull the hood lock control cable assembly from the engine compartment to remove it. |
Toyota Avalon (XX50) 2019-2022 Service & Repair Manual > Electric Parking Brake System(for Hv Model): Open circuit in Power source circuit (C13A0,C13A5,C13B0)
DESCRIPTION The following DTCs are stored when a malfunction occurs in the parking brake ECU (brake actuator assembly). DTC No. Detection Item DTC Detection Condition Trouble Area Memory Note C13A0 Open circuit in Power source circuit Both of following conditions are met: Power switch on (IG) or ele ...