REASSEMBLY PROCEDURE 1. INSTALL SLIDING ROOF DRIVE CABLE SUB-ASSEMBLY (a) Hold down the roof wind deflector panel sub-assembly. 
(b) Using a screwdriver, slide the sliding roof drive cable LH as shown in the illustration to install it. 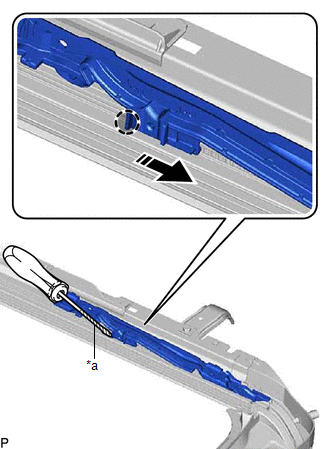
HINT:
(c) Adjust Fully Closed Position:
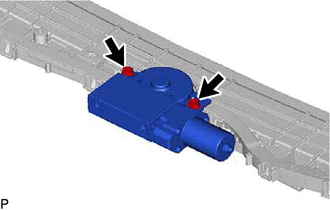
(d) Insert the rear roof drip channel into the sliding roof housing sub-assembly as shown in the illustration. 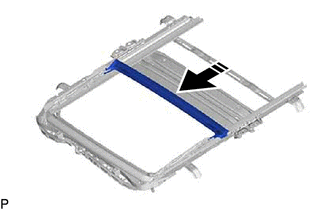
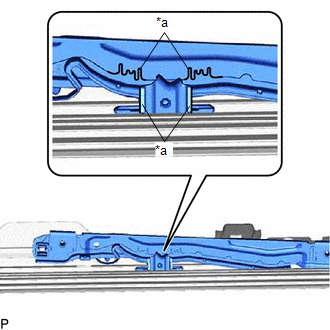
(e) Engage the 2 claws as shown in the illustration to install the rear roof drip channel. 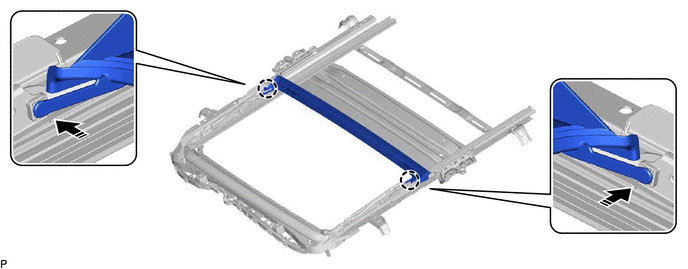
2. INSTALL SUNSHADE TRIM SUB-ASSEMBLY (a) Insert the sunshade trim sub-assembly into the sliding roof housing sub-assembly as shown in the illustration to install it. 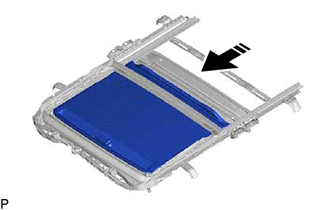
(b) Install the rear sliding roof sunshade stopper as shown in the illustration. 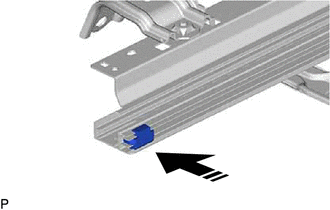
HINT: Use the same procedure for the RH side. (c) Move the sliding roof piece sub-assembly LH in the direction indicated by the arrow (1) shown in the illustration to engage the 2 claws. 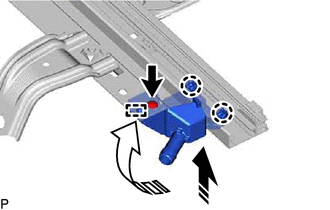
HINT: Use the same procedure for the RH side. (d) Move the sliding roof piece sub-assembly LH in the direction indicated by the arrow (2) shown in the illustration to engage the guide. HINT: Use the same procedure for the RH side. (e) Install the sliding roof piece sub-assembly LH with the screw. HINT: Use the same procedure for the RH side. 3. INSTALL SLIDING ROOF DRIVE GEAR ASSEMBLY (a) Apply MP grease to the gear of the sliding roof drive gear assembly.
(c) Engage the guide and claw as shown in the illustration. 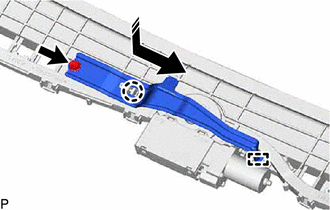
(d) Install the map light bracket with the bolt. Torque: 5.4 N·m {55 kgf·cm, 48 in·lbf} |
Toyota Avalon (XX50) 2019-2022 Service & Repair Manual > Audio And Visual System(for Hv Model): Speaker Circuit
DESCRIPTION for 8 Speakers If there is a short in a speaker circuit, the radio and display receiver assembly detects it and stops output to the speakers. Thus sound cannot be heard from the speakers even if there is no malfunction in the radio and display receiver assembly, DCM (telematics transceiv ...