Toyota Avalon (XX50) 2019-2022 Service & Repair Manual: Installation

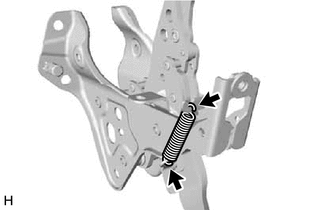
INSTALLATION

PROCEDURE

1. INSTALL BRAKE PEDAL PAD

(a) Install the brake pedal pad to the brake pedal support assembly.

HINT:

Installation is easier after applying a small amount of soapy water.

2. INSTALL STOP LIGHT SWITCH MOUNTING ADJUSTER

(a) Engage the 2 claws to install the stop light switch mounting adjuster.

3. INSTALL BRAKE PEDAL RETURN SPRING

(a) Install the brake pedal return spring to the brake pedal support assembly.

NOTICE:

Attach the bottom part of the brake pedal return spring first, making sure that the open part of the hook is facing the front of the vehicle. Attach the top part of the brake pedal return spring second, making sure that the open part of the hook is facing the rear of the vehicle.

4. INSTALL BRAKE PEDAL SUPPORT ASSEMBLY

(a) Push the brake booster assembly toward the engine compartment, and install the brake pedal support assembly while avoiding the stud bolts of the brake booster assembly and brake booster support base.

NOTICE:

  • Be careful not to deform the bracket of the instrument panel reinforcement assembly.
  • Do not apply excessive force to the brake lines.
  • Do not apply excessive force to the wire harness.

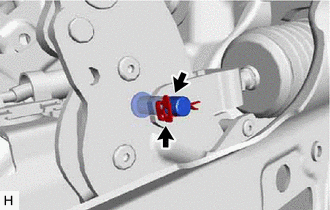
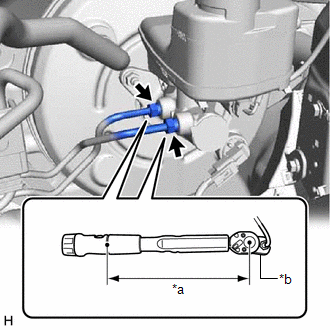
(b) Return the brake booster assembly to its original position.

(c) Install the brake pedal support assembly with the 4 nuts.

Torque:

12.8 N·m {131 kgf·cm, 9 ft·lbf}

(d) Install the brake pedal support assembly to the instrument panel reinforcement assembly with the bolt.

Torque:

15 N·m {153 kgf·cm, 11 ft·lbf}

(e) Engage the clamp to install the wire harness to the brake pedal support assembly.

5. INSTALL PUSH ROD PIN

(a) Apply lithium soap base glycol grease to the push rod pin.

Lithium Soap Base Glycol Grease

(b) Connect the brake master cylinder push rod clevis to the brake pedal support assembly with the push rod pin, and install a new clip as shown in the illustration.

HINT:

The push rod pin can be installed in either direction.

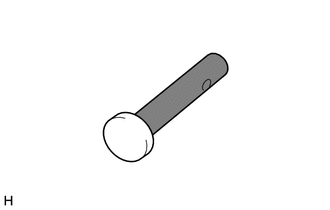
6. INSTALL STOP LIGHT SWITCH ASSEMBLY

Click here

7. INSTALL NO. 1 INSTRUMENT PANEL UNDER COVER SUB-ASSEMBLY

Click here

8. CONNECT BRAKE LINE

(a) Using a union nut wrench, connect the 2 brake lines to the brake master cylinder sub-assembly.

Torque:

Specified tightening torque :

19.5 N·m {199 kgf·cm, 14 ft·lbf}

NOTICE:

  • Do not kink or damage the brake lines.
  • Do not allow the brake lines to twist or interfere with other parts or the vehicle body during tightening.
  • Do not allow any foreign matter such as dirt or dust to enter the brake lines from the connecting parts.

HINT:

  • Calculate the torque wrench reading when changing the fulcrum length of the torque wrench.

    Click here

  • When using a union nut wrench (fulcrum length of 20 mm (0.787 in.)) + torque wrench (fulcrum length of 162 mm (6.38 in.)):

    17.4 N*m (177 kgf*cm, 13 ft.*lbf)

*a

Torque Wrench Fulcrum Length

*b

Union Nut Wrench

9. BLEED BRAKE SYSTEM

Click here

10. INSTALL BATTERY

Click here

11. INSPECT AND ADJUST BRAKE PEDAL

Click here

    Components

    Removal

    See More:

    Toyota Avalon (XX50) 2019-2022 Service & Repair Manual > Blind Spot Monitor System(for Gasoline Model): How To Proceed With Troubleshooting
    CAUTION / NOTICE / HINT HINT: Use the following procedure to troubleshoot the blind spot monitor system. *: Use the Techstream. PROCEDURE 1. VEHICLE BROUGHT TO WORKSHOP NEXT 2. CUSTOMER PROBLEM ANALYSIS HINT: If there are any scratches or impact marks on the rear bumper, perform the blind spot monit ...

    Toyota Avalon (XX50) 2019-2022 Owners Manual

    Toyota Avalon (XX50) 2019-2022 Service & Repair Manual

    © 2024 Copyright www.tavalon.net
    0.0153