REMOVAL CAUTION / NOTICE / HINT The necessary procedures (adjustment, calibration, initialization or registration) that must be performed after parts are removed and installed, or replaced during transmission wire removal/installation are shown below. Necessary Procedures After Parts Removed/Installed/Replaced
PROCEDURE 1. REMOVE FRONT WHEEL LH Click here 2. REMOVE FRONT WHEEL OPENING EXTENSION PAD LH Click here
3. REMOVE FRONT WHEEL OPENING EXTENSION PAD RH Click here 4. REMOVE NO. 1 ENGINE UNDER COVER Click here 5. REMOVE REAR ENGINE UNDER COVER LH Click here 6. REMOVE FRONT FENDER APRON SEAL LH Click here 7. DRAIN AUTOMATIC TRANSAXLE FLUID
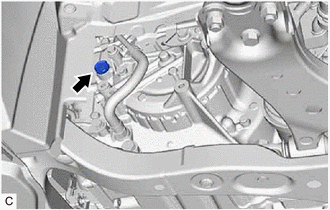
(d) Using a 6 mm hexagon socket wrench, install the No. 1 transmission oil filler tube to the transaxle housing. Torque: 1.7 N·m {17 kgf·cm, 15 in·lbf} (e) Using a 10 mm hexagon socket wrench, temporarily install the gasket and overflow plug to the transaxle housing. HINT: Reuse the old gasket as the overflow plug will be removed again to adjust the automatic transaxle fluid level. (f) Temporarily install the gasket and refill plug to avoid automatic transaxle fluid spillage. HINT: Reuse the old gasket as the refill plug will be removed again to adjust the automatic transaxle fluid level. 8. REMOVE FRONT ENGINE MOUNTING INSULATOR Click here
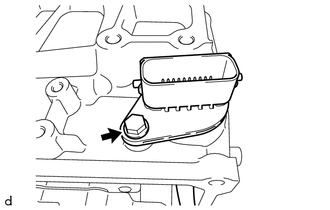
9. REMOVE FRONT SUSPENSION MEMBER DYNAMIC DAMPER Click here 10. SEPARATE OIL COOLER UNION SUB-ASSEMBLY
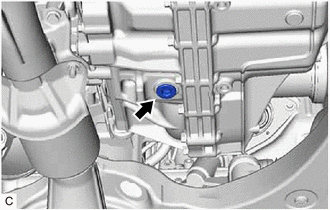
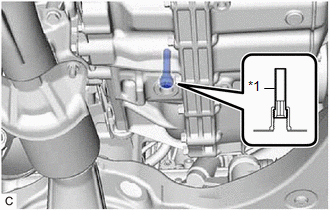
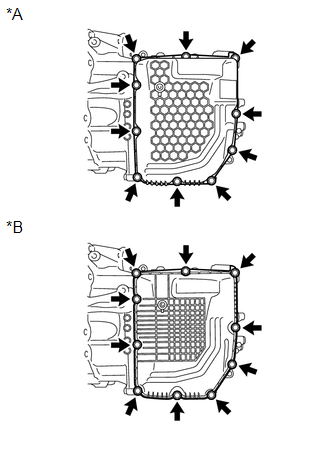
(b) Remove the oil cooler union bolt and 2 gaskets to separate the oil cooler union sub-assembly from the automatic transaxle case sub-assembly. 11. REMOVE TRANSMISSION CASE SIDE COVER
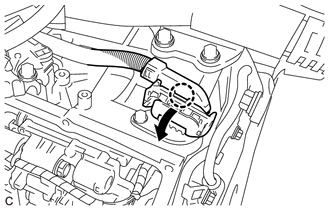
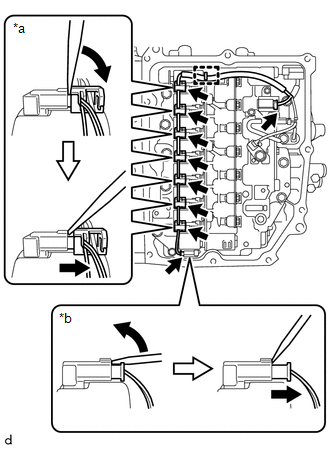
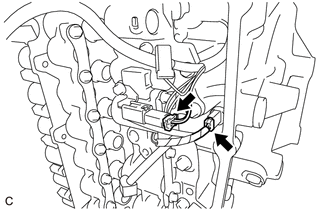
12. REMOVE TRANSMISSION WIRE
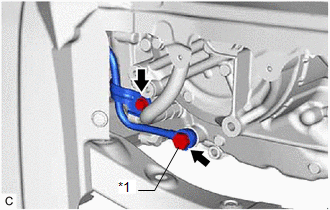
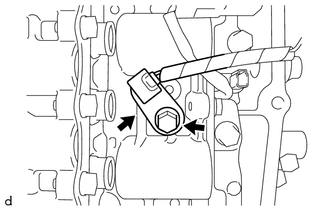
(c) Disconnect the 9 solenoid valve connectors. HINT:
|
Toyota Avalon (XX50) 2019-2022 Service & Repair Manual > Occupant Classification System(for Hv Model): Fail-safe Chart
FAIL-SAFE CHART FAIL-SAFE FUNCTION (a) The following chart shows the status of the front passenger SRS items and passenger airbag ON/OFF indicator operation under each condition. The passenger airbag ON/OFF indicator ("ON" and "OFF") comes on for approximately 4 seconds, then turns off for approxima ...