REMOVAL CAUTION / NOTICE / HINT The necessary procedures (adjustment, calibration, initialization, or registration) that must be performed after parts are removed and installed, or replaced during front brake flexible hose removal/installation are shown below. Necessary Procedures After Parts Removed/Installed/Replaced
NOTICE: If both left and right front flexible hoses are disconnected at the same time, be sure to place an identification mark on each hose to indicate its installation position. HINT:
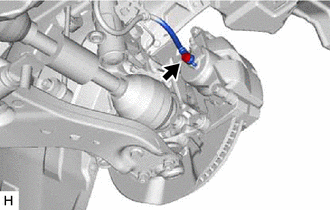
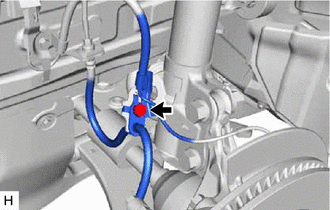
PROCEDURE 1. PRECAUTION (for HV Model) NOTICE: After turning the power switch off, waiting time may be required before disconnecting the cable from the negative (-) auxiliary battery terminal. Therefore, make sure to read the disconnecting the cable from the negative (-) auxiliary battery terminal notices before proceeding with work. Click here 2. DISABLE BRAKE CONTROL (for HV Model) Click here 3. REMOVE FRONT WHEEL Click here 4. DRAIN BRAKE FLUID NOTICE: If brake fluid leaks onto any painted surface, immediately wash it off. 5. REMOVE FRONT FLEXIBLE HOSE
(d) Remove the clip and front flexible hose from the vehicle body. | |||||||||||||||||||||||||||||
Toyota Avalon (XX50) 2019-2022 Service & Repair Manual > Throttle Body: Inspection
INSPECTION PROCEDURE 1. INSPECT THROTTLE BODY WITH MOTOR ASSEMBLY (a) Measure the resistance according to the value(s) in the table below. Standard Resistance: Tester Connection Condition Specified Condition 5 (M-) - 6 (M+) 20°C (68°F) 0.3 to 100 Ω If the result is not as specified, replace the t ...