REMOVAL CAUTION / NOTICE / HINT The necessary procedures (adjustment, calibration, initialization or registration) that must be performed after parts are removed and installed, or replaced during rear crankshaft oil seal removal/installation are shown below. Necessary Procedure After Parts Removed/Installed/Replaced
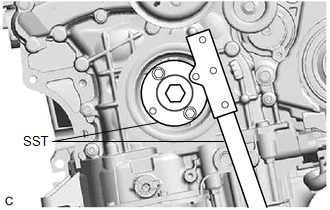
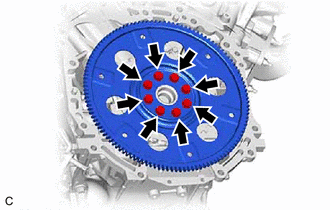
PROCEDURE 1. REMOVE AUTOMATIC TRANSAXLE ASSEMBLY Click here 2. REMOVE DRIVE PLATE AND RING GEAR SUB-ASSEMBLY (a) Using height adjustment attachments and plate lift attachments, place the engine assembly on a flat level surface. NOTICE:
3. REMOVE NO. 1 CRANKSHAFT POSITION SENSOR PLATE (a) Remove the No. 1 crankshaft position sensor plate. 4. REMOVE REAR ENGINE OIL SEAL
(b) Using a screwdriver with its tip wrapped with protective tape, pry out the rear engine oil seal. NOTICE: Be careful not to damage the crankshaft. |
Toyota Avalon (XX50) 2019-2022 Service & Repair Manual > Lighting System(for Gasoline Model Without Cornering Light): Automatic High Beam Camera (B124C)
DESCRIPTION The main body ECU (multiplex network body ECU) detects a high beam headlight illumination request signal of the automatic high beam system from the forward recognition camera. DTC No. Detection Item DTC Detection Condition Trouble Area DTC Output from B124C Automatic High Beam Camera Mal ...