Components COMPONENTS ILLUSTRATION 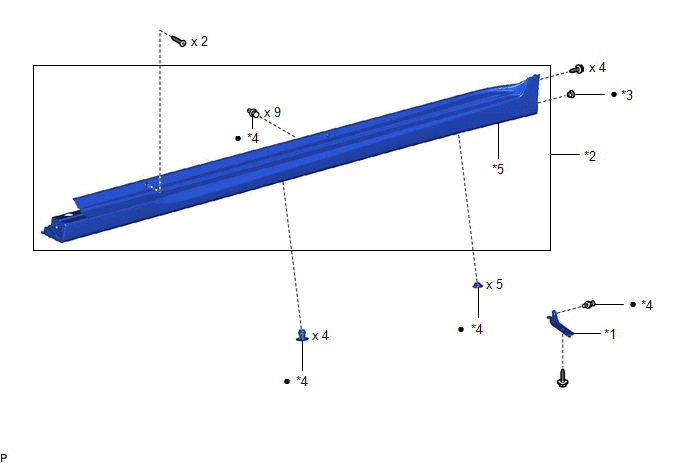
Installation INSTALLATION CAUTION / NOTICE / HINT HINT:
PROCEDURE 1. INSTALL ROCKER PANEL MOULDING ASSEMBLY (a) Install 9 new clips to the rocker panel moulding. (b) Engage the 9 clips as shown in the illustration. 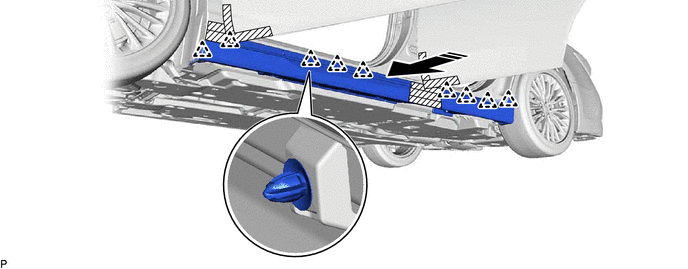
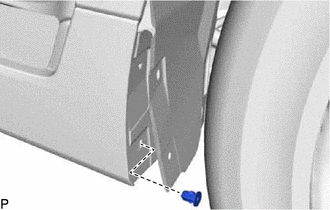
(d) Install the 6 screws. (e) Install the rocker panel moulding assembly with 9 new clips. 2. INSTALL FRONT ROCKER PANEL MOULDING END COVER Click here
Removal REMOVAL CAUTION / NOTICE / HINT HINT:
PROCEDURE 1. REMOVE FRONT ROCKER PANEL MOULDING END COVER Click here 2. REMOVE ROCKER PANEL MOULDING ASSEMBLY (a) Apply protective tape around the rocker panel moulding assembly and doors as shown in the illustration. 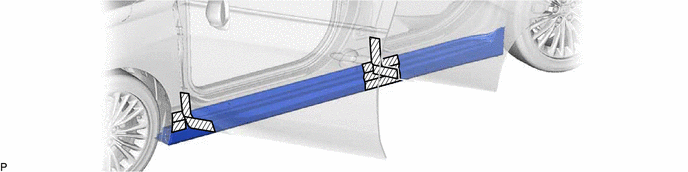
(b) Remove the 9 clips.  (c) Remove the 6 screws. 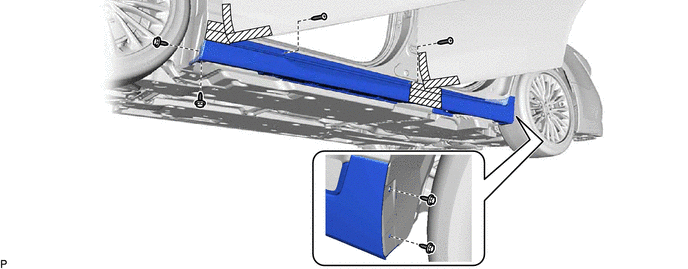
(e) Disengage the 9 clips to remove the rocker panel moulding assembly as shown in the illustration. 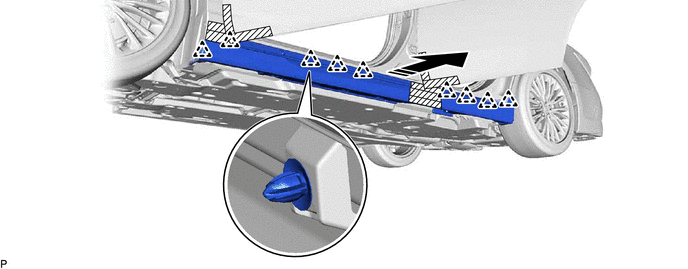
(f) Remove the 9 clips from the rocker panel moulding. |
Toyota Avalon (XX50) 2019-2022 Service & Repair Manual > Smart Key System(for Entry Function, Gasoline Model): Problem Symptoms Table
PROBLEM SYMPTOMS TABLE HINT: If a problem occurs in certain locations or at certain times of day, check for the possibility of wave interference. When the electrical key transmitter sub-assembly is brought near an electrical key and tire pressure monitoring system receiver assembly (RF band), door o ...