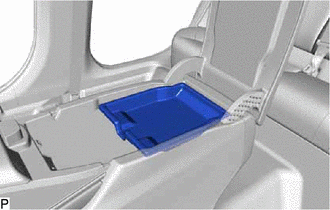
REMOVAL PROCEDURE 1. REMOVE CONSOLE BOX POCKET
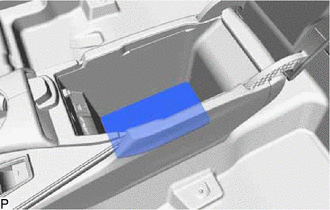
2. REMOVE CONSOLE BOX CARPET
3. REMOVE LOWER INSTRUMENT PANEL FINISH PANEL LH (a) Disengage the 9 clips as shown in the illustration to remove the lower instrument panel finish panel LH. 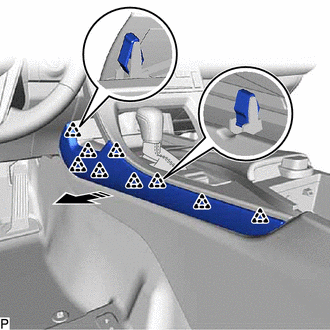
4. REMOVE LOWER INSTRUMENT PANEL FINISH PANEL RH (a) Disengage the 8 clips as shown in the illustration to remove the lower instrument panel finish panel RH. 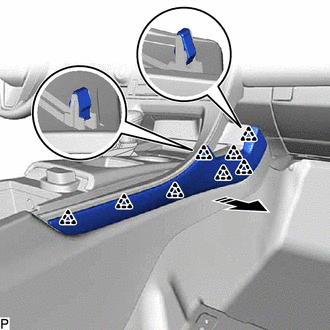
5. REMOVE FRONT CONSOLE UPPER PANEL GARNISH (a) Disengage the 6 clips as shown in the illustration. 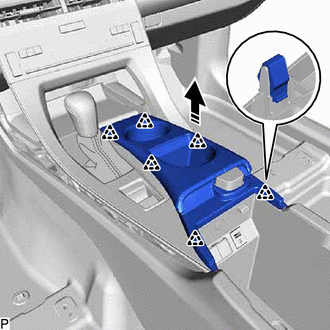
(c) Disengage the 2 clamps to remove the front console upper panel garnish. 6. REMOVE CONSOLE BOX POCKET SUB-ASSEMBLY (a) Disengage the 12 clips as shown in the illustration to remove the console box pocket sub-assembly. 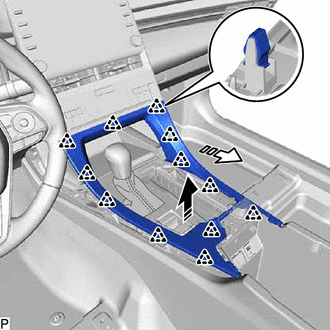
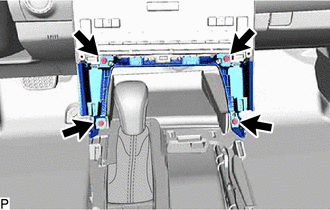
7. REMOVE CENTER INSTRUMENT CLUSTER FINISH PANEL SUB-ASSEMBLY
(b) Disengage the 2 clips and 2 guides as shown in the illustration to remove the center instrument cluster finish panel sub-assembly. 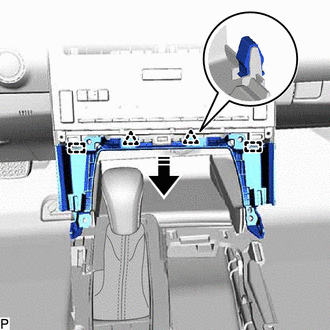
8. REMOVE SHIFT LEVER KNOB SUB-ASSEMBLY for Gasoline Model: Click here for HV Model: Click here
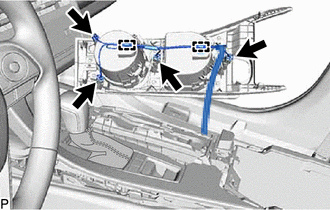
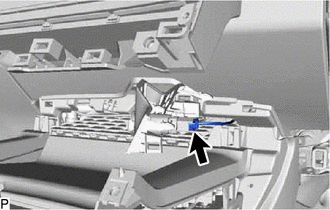
9. REMOVE REAR UPPER CONSOLE PANEL SUB-ASSEMBLY (a) Disengage the 7 clips as shown in the illustration. 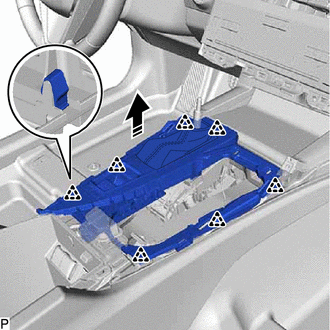
10. REMOVE INSTRUMENT PANEL FINISH PANEL END LH (a) Disengage the 2 claws, clip and guide as shown in the illustration to remove the instrument panel finish panel end LH. 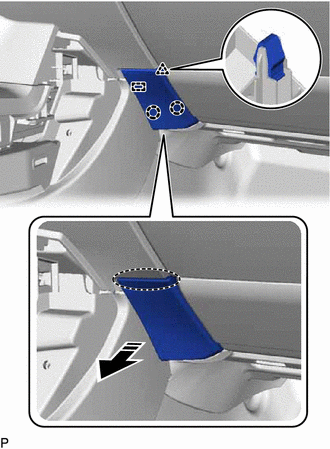
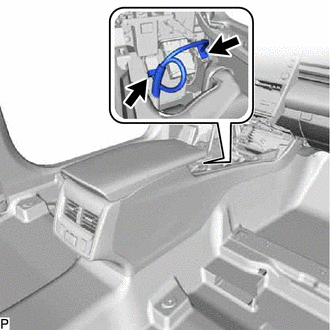
11. REMOVE CONSOLE BOX BEZEL (a) Disengage the 6 clips as shown in the illustration. 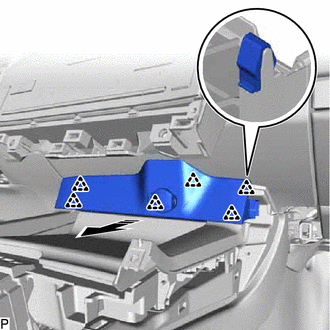
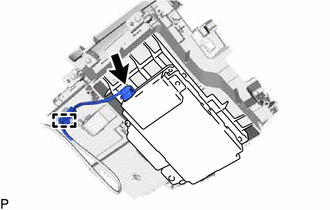
12. REMOVE UPPER FRONT CONSOLE PANEL SUB-ASSEMBLY (a) Disengage the 4 clips as shown in the illustration. 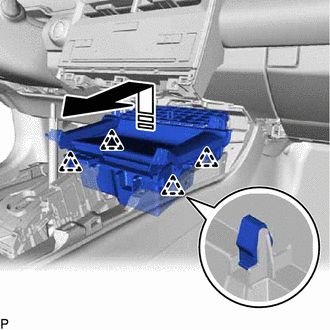
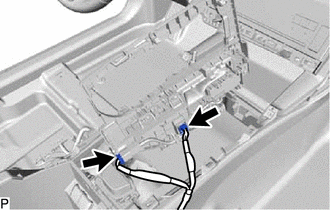
13. REMOVE CONSOLE ASSEMBLY
(c) Disengage the 2 clips as shown in the illustration to remove the console assembly. 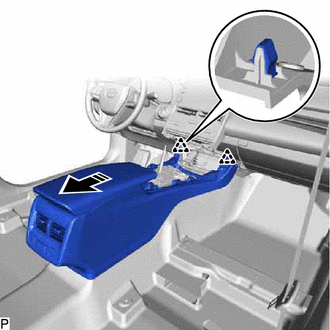
|
Toyota Avalon (XX50) 2019-2022 Service & Repair Manual > Front Door Window Frame Moulding: Components
COMPONENTS ILLUSTRATION *1 FRONT DOOR GLASS RUN *2 FRONT DOOR LOWER FRAME BRACKET GARNISH *3 FRONT DOOR PANEL PROTECTOR *4 FRONT DOOR UPPER WINDOW FRAME MOULDING *5 FRONT DOOR WEATHERSTRIP *6 FRONT DOOR WINDOW FRAME MOULDING (CENTER PILLAR SIDE) *7 RIVET - - ● Non-reusable part - - ...