Toyota Avalon (XX50) 2019-2022 Service & Repair Manual: Inspection

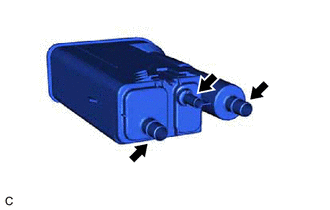
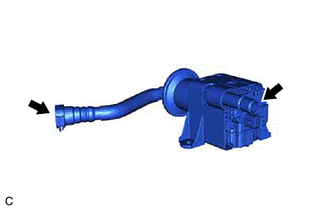
INSPECTION

PROCEDURE

1. INSPECT CANISTER (CHARCOAL CANISTER ASSEMBLY)

(a) Visually check the canister (charcoal canister assembly).

(1) Visually check the canister (charcoal canister assembly) for cracks or damage.

If cracks or damage are found, replace the canister (charcoal canister assembly).

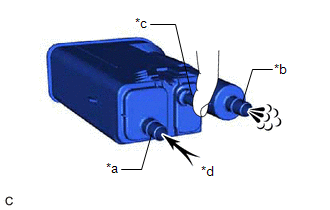
(b) Check canister (charcoal canister assembly) operation.

(1) With the purge line port closed, blow 0.5 kPa (0.005 kgf/cm2, 0.1 psi) of air into the vent line port, and check that air flows from the air line port.

If the result is not as specified, replace the canister (charcoal canister assembly).

*a

Vent Line Port

*b

Air Line Port

*c

Purge Line Port

*d

Air

(2) With the vent line port closed, blow 0.5 kPa (0.005 kgf/cm2, 0.1 psi) of air into the air line port, and check that air flows from the purge line port.

If the result is not as specified, replace the canister (charcoal canister assembly).

*a

Vent Line Port

*b

Air Line Port

*c

Purge Line Port

*d

Air

(c) Check for air leaks.

(1) Connect a pressure gauge to the vent line port.

*a

Pressure Gauge

*b

Vent Line Port

*c

Air Line Port

*d

Purge Line Port

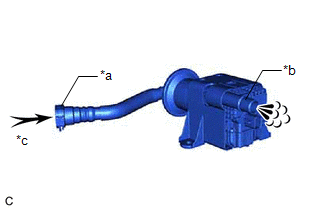
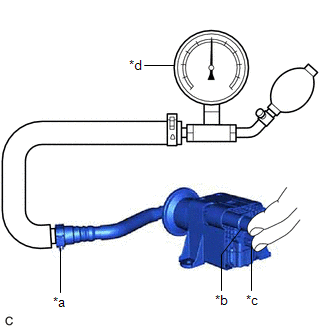
(2) With the purge line port and air line port closed, apply 20 kPa (150 mmHg, 5.91 in. Hg) of pressurized air into the vent line port, then confirm that pressure is maintained for 1 minute.

If the result is not as specified, replace the canister (charcoal canister assembly).

2. INSPECT NO. 2 CHARCOAL CANISTER SUB-ASSEMBLY

(a) Visually check the No. 2 charcoal canister sub-assembly.

(1) Visually check the No. 2 charcoal canister sub-assembly for cracks or damage.

If cracks or damage are found, replace the No. 2 charcoal canister sub-assembly.

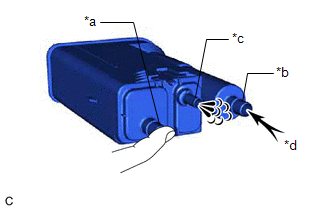
(b) Check No. 2 charcoal canister sub-assembly operation.

(1) Blow 0.5 kPa (0.005 kgf/cm2, 0.1 psi) of air into the port A, and check that air flows from the port B.

If the result is not as specified, replace the No. 2 charcoal canister sub-assembly.

*a

Port A

*b

Port B

*c

Air

(c) Check for air leaks.

(1) Connect a pressure gauge to the port A.

*a

Port A

*b

Port B

*c

Leak Detection Pump Sub-assembly Connector

*d

Pressure Gauge

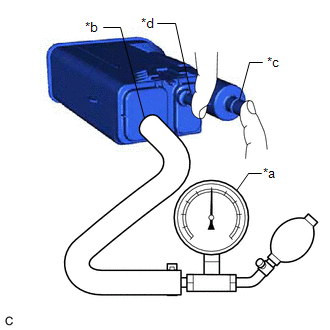
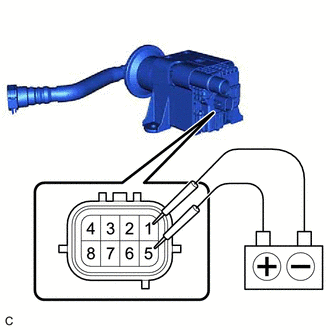
(2) With the port B and leak detection pump sub-assembly connector closed, apply 20 kPa (150 mmHg, 5.91 in. Hg) of pressurized air into the port A, then confirm that pressure is maintained for 1 minute.

If the result is not as specified, replace the No. 2 charcoal canister sub-assembly.

(d) Check the leak detection pump sub-assembly.

(1) Connect a positive (+) lead from the battery to terminal 5 and a negative (-) lead to terminal 1.

(2) Check that a clicking sound is heard from the leak detection pump sub-assembly.

If the result is not as specified, replace the leak detection pump sub-assembly.

    Components

    Installation

    See More:

    Toyota Avalon (XX50) 2019-2022 Service & Repair Manual > Brake Actuator(for Hv Model): Removal
    REMOVAL CAUTION / NOTICE / HINT The necessary procedures (adjustment, calibration, initialization, or registration) that must be performed after parts are removed, installed, or replaced during brake actuator assembly removal/installation are shown below. Necessary Procedures After Parts Removed/Ins ...

    Toyota Avalon (XX50) 2019-2022 Owners Manual

    Toyota Avalon (XX50) 2019-2022 Service & Repair Manual

    © 2024 Copyright www.tavalon.net
    0.0237