DISASSEMBLY CAUTION / NOTICE / HINT The necessary procedures (adjustment, calibration, initialization, or registration) that must be performed after parts are removed and installed, or replaced during luggage compartment door rmoval/installation are shown below. Necessary Procedure After Parts Removed/Installed/Replaced (for Gasoline Model)
PROCEDURE 1. REMOVE LUGGAGE COMPARTMENT DOOR COVER
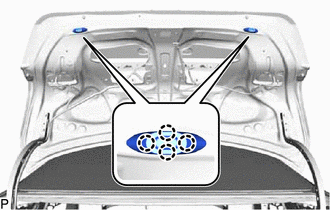
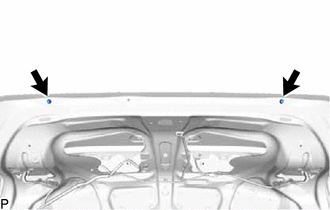
2. REMOVE BACK DOOR UPPER HINGE PROTECTOR LH
3. REMOVE BACK DOOR UPPER HINGE PROTECTOR RH
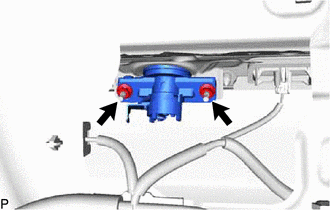
4. REMOVE LUGGAGE COMPARTMENT DOOR LOCK ASSEMBLY Click here
5. REMOVE LUGGAGE COMPARTMENT DOOR LOCK CYLINDER ASSEMBLY
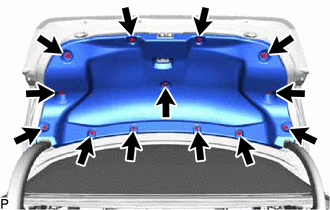
6. REMOVE LUGGAGE COMPARTMENT DOOR CUSHION
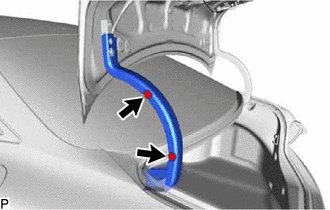
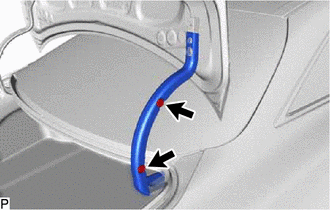
7. REMOVE HOLE PLUG
8. REMOVE REAR LIGHT ASSEMBLY LH Click here
9. REMOVE REAR LIGHT ASSEMBLY RH HINT: Use the same procedure as for the LH side. 10. REMOVE NO. 2 BACK DOOR OUTSIDE GARNISH Click here 11. REMOVE LUGGAGE COMPARTMENT DOOR OUTSIDE GARNISH SUB-ASSEMBLY Click here 12. REMOVE LUGGAGE ELECTRICAL KEY SWITCH Click here 13. REMOVE TELEVISION CAMERA ASSEMBLY Click here 14. REMOVE LICENSE PLATE LIGHT ASSEMBLY Click here HINT: Use the same procedure as for the LH side. 15. REMOVE REAR SPOILER SUB-ASSEMBLY (w/ Rear Spoiler) Click here
|
Toyota Avalon (XX50) 2019-2022 Service & Repair Manual > Front Seat Cushion Heater: Components
COMPONENTS ILLUSTRATION *1 FRONT SEAT CUSHION SHIELD *2 FRONT SEAT FRONT CUSHION SHIELD *3 FRONT SEAT INNER CUSHION SHIELD - - ILLUSTRATION *1 SEPARATE TYPE FRONT SEATBACK ASSEMBLY *2 SEPARATE TYPE FRONT SEAT CUSHION ASSEMBLY Tightening torque for "Major areas involving basic vehicle performance suc ...