Components COMPONENTS ILLUSTRATION 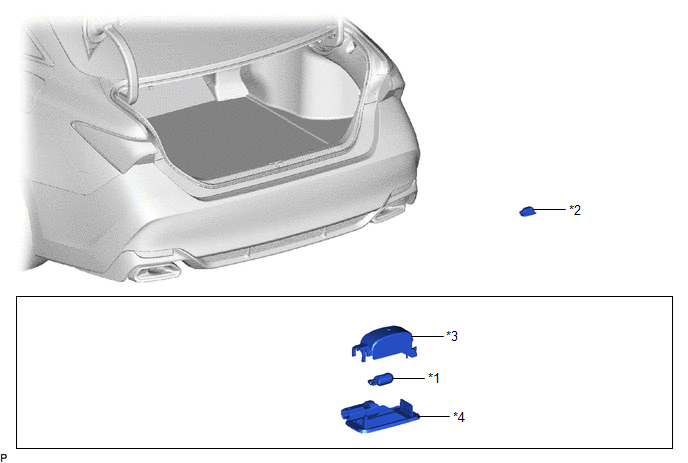
Inspection INSPECTION PROCEDURE 1. INSPECT NO. 1 LUGGAGE COMPARTMENT LIGHT ASSEMBLY 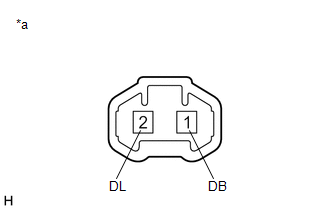
(a) Apply auxiliary battery voltage to the No. 1 luggage compartment light assembly and check that the light illuminates. OK:
If the result is not as specified, replace the bulb or No. 1 luggage compartment light assembly. Installation INSTALLATION PROCEDURE 1. INSTALL LUGGAGE COMPARTMENT LIGHT BULB (a) Install the luggage compartment light bulb to the No. 1 luggage compartment light lens as shown in the illustration. 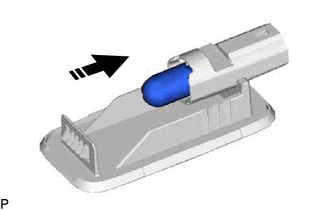
2. INSTALL NO. 1 LUGGAGE COMPARTMENT LIGHT ASSEMBLY (a) Connect the connector.
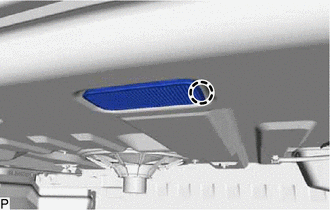
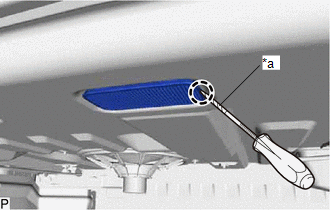
Removal REMOVAL PROCEDURE 1. REMOVE NO. 1 LUGGAGE COMPARTMENT LIGHT ASSEMBLY
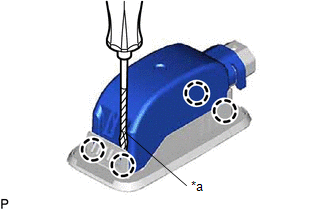
(b) Disconnect the connector to remove the No. 1 luggage compartment light assembly. 2. REMOVE LUGGAGE COMPARTMENT LIGHT BULB
(b) Remove the luggage compartment light bulb from the No. 1 luggage compartment light lens as shown in the illustration. 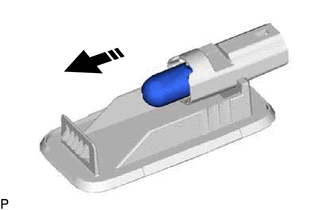
|
Toyota Avalon (XX50) 2019-2022 Service & Repair Manual > Fuel Pump: Reassembly
REASSEMBLY PROCEDURE 1. INSTALL FUEL PUMP HINT: Perform "Inspection After Repair" after replacing the fuel pump. Click here (a) Apply gasoline to a new O-ring. Then install the O-ring and fuel pump spacer to the fuel pump. *1 O-ring *2 Fuel Pump Spacer (b) Install the fuel pump to the suction filter ...