DISASSEMBLY CAUTION / NOTICE / HINT CAUTION: Wear protective gloves. Sharp areas on the parts may injure your hands. HINT:
PROCEDURE 1. REMOVE SEAT POSITION AIRBAG SENSOR (for Driver Side) Click here 2. REMOVE POSITION CONTROL ECU ASSEMBLY LH (w/ Seat Position Memory System) Click here 3. REMOVE OCCUPANT DETECTION ECU (for Front Passenger Side) Click here 4. REMOVE FRONT SEAT INNER BELT ASSEMBLY LH (for Driver Side) Click here 5. REMOVE FRONT SEAT INNER BELT ASSEMBLY RH (for Front Passenger Side) Click here 6. DISCONNECT SEPARATE TYPE FRONT SEATBACK COVER
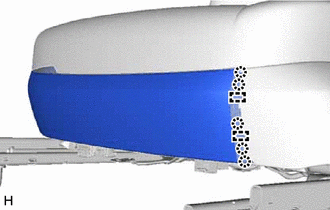
7. REMOVE FRONT SEAT FRONT CUSHION SHIELD
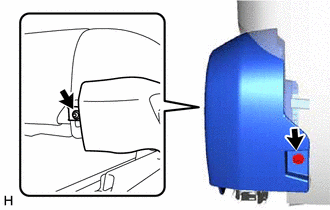
8. REMOVE FRONT SEAT CUSHION SHIELD
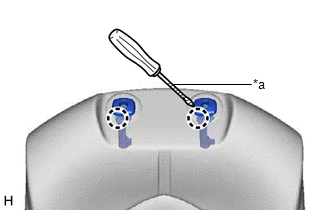
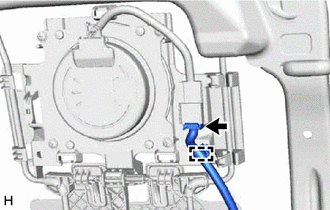
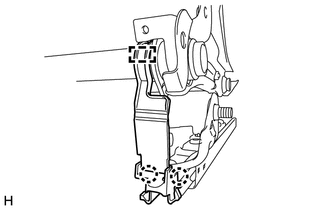
(c) Using a screwdriver with its tip wrapped with protective tape, disengage the 2 claws and slightly pull the front seat cushion shield as shown in the illustration. 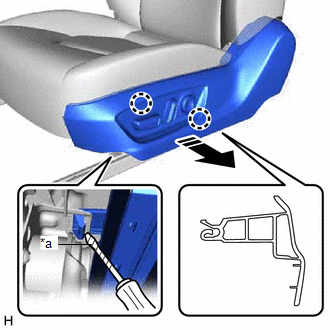
(d) Disengage the guide as shown in the illustration. 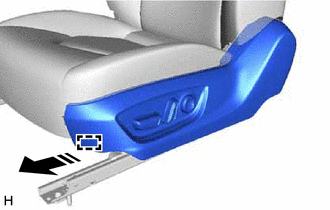
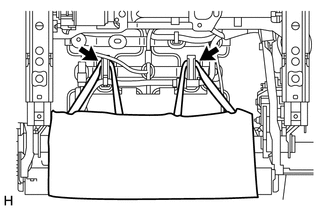
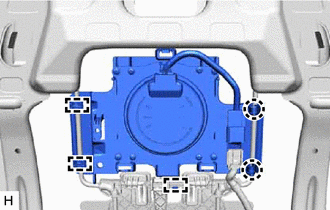
9. REMOVE FRONT SEAT INNER CUSHION SHIELD
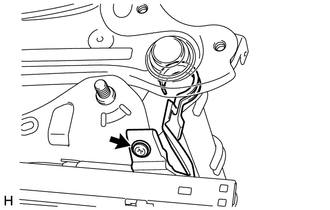
(b) Disengage the guide to remove the front seat inner cushion shield as shown in the illustration. 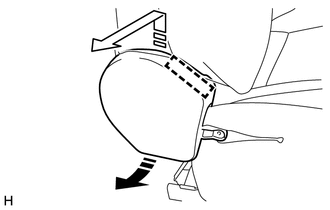
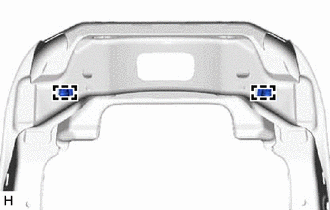
10. REMOVE FRONT SEAT LOWER CUSHION SHIELD
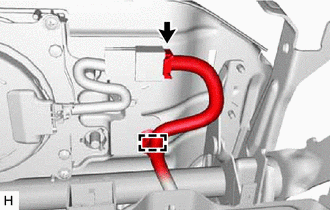
(b) Disengage the claw to remove the front seat lower cushion shield as shown in the illustration. 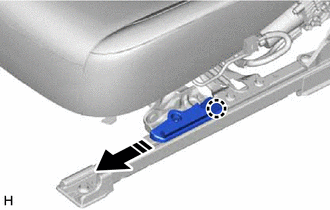
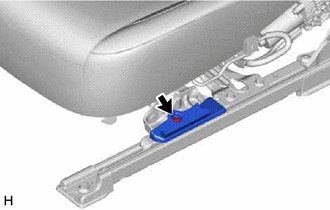
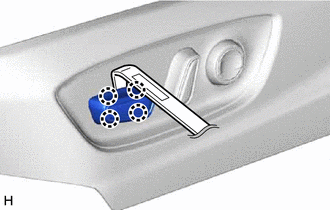
11. REMOVE SLIDE AND VERTICAL POWER SEAT SWITCH KNOB
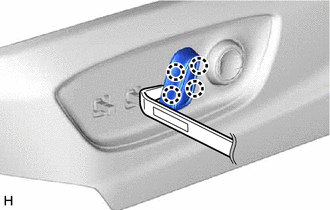
12. REMOVE RECLINING POWER SEAT SWITCH KNOB
13. REMOVE FRONT POWER SEAT SWITCH Click here
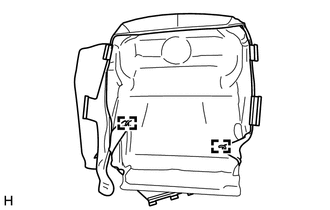
14. REMOVE SEPARATE TYPE FRONT SEATBACK ASSEMBLY
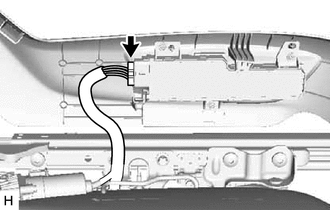
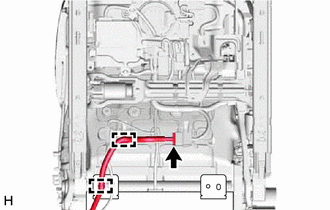
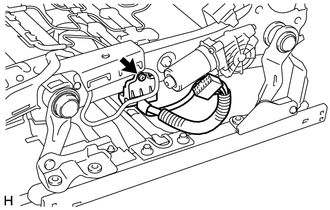
(d) Disconnect the connector to separate the front seat No. 2 wire.
(f) Disconnect the connector to separate the front seatback heater assembly connector.
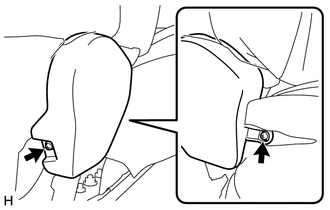
15. REMOVE FRONT SEAT HEADREST SUPPORT
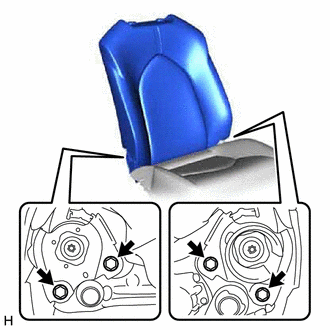
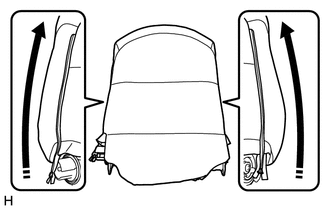
16. REMOVE SEPARATE TYPE FRONT SEATBACK COVER WITH PAD (a) Remove the separate type front seatback cover with pad. 17. REMOVE SEPARATE TYPE FRONT SEATBACK COVER (a) Remove the 10 hog rings, disengage the fastener and remove the separate type front seatback cover from the separate type front seatback pad. 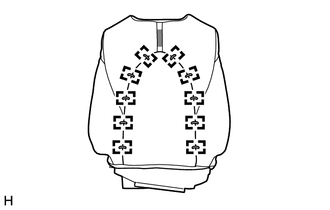
18. REMOVE FRONT SEATBACK HEATER ASSEMBLY Click here 19. REMOVE FRONT SEAT AIRBAG ASSEMBLY Click here 20. REMOVE SEATBACK CLIMATE CONTROL BLOWER (w/ Climate Control Seat System)
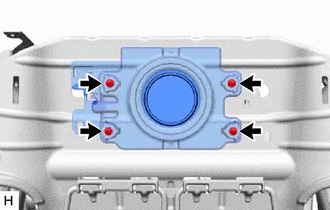
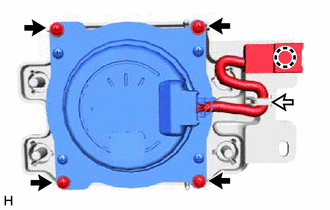
(d) Remove the 4 screws and seatback climate control blower from the seatback blower fan adapter. 21. REMOVE FRONT SEATBACK SPRING SUB-ASSEMBLY RH (w/o Lumbar Support)
22. REMOVE LUMBAR SUPPORT ADJUSTER ASSEMBLY (w/ Lumbar Support) Click here
23. REMOVE FRONT NO. 2 SEATBACK HOOK (w/ Climate Control Seat System)
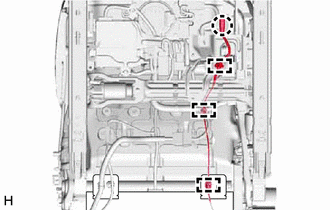
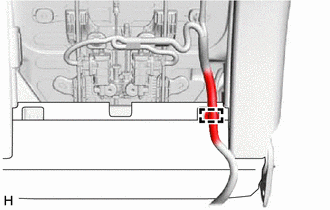
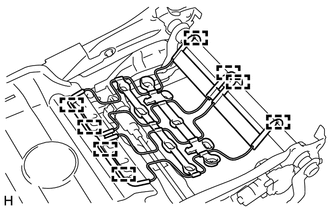
24. REMOVE FRONT SEAT NO. 2 WIRE (a) Disconnect each connector and disengage each clamp to remove the front seat No. 2 wire. 25. REMOVE SEPARATE TYPE FRONT SEAT CUSHION COVER WITH PAD
(b) Disconnect the connector to separate the front seat cushion heater assembly wire harness. (c) Disengage the 9 hooks and remove the separate type front seat cushion cover with pad from the separate type front seat cushion spring assembly. 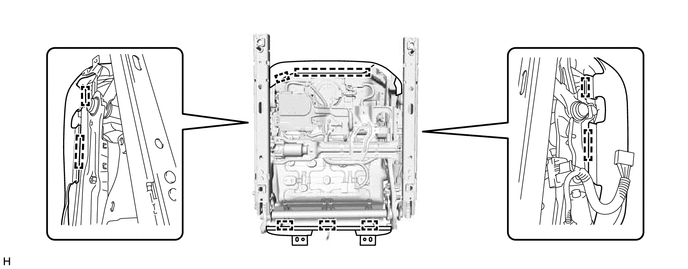 26. REMOVE SEPARATE TYPE FRONT SEAT CUSHION COVER
(b) Remove the 13 hog rings, disengage the 2 fasteners and remove the separate type front seat cushion cover from the separate type front seat cushion pad. 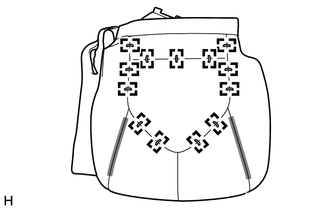
27. REMOVE FRONT SEAT CUSHION HEATER ASSEMBLY Click here 28. REMOVE LH SEAT RECLINING ADJUSTER INSIDE COVER
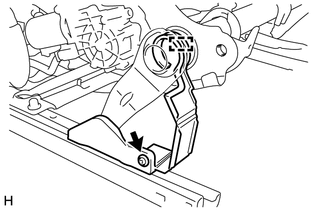
29. REMOVE FRONT SEAT LOWER CUSHION SHIELD LH (for Driver Side)
(b) Disengage the hook.
30. REMOVE FRONT SEAT LOWER CUSHION SHIELD RH (for Driver Side)
(b) Disengage the 2 claws to remove the front seat lower cushion shield RH. 31. REMOVE FRONT SEAT LOWER CUSHION SHIELD LH (for Front Passenger Side)
(c) Disengage the claw and guide to remove the front seat lower cushion shield LH. 32. REMOVE FRONT SEAT LOWER CUSHION SHIELD RH (for Front Passenger Side) HINT: Use the same procedure as for the front seat lower cushion shield LH (for Driver Side). 33. REMOVE SEAT TRACK UPPER RAIL COVER LH (a) Disengage the 2 claws to remove the seat track upper rail cover LH as shown in the illustration. 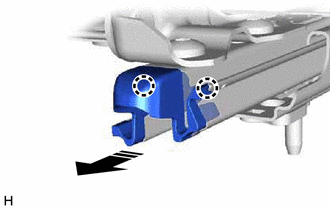
34. REMOVE SEAT TRACK UPPER RAIL COVER RH HINT: Use the same procedure as for the LH side. 35. REMOVE LH SEAT SEAT TRACK UPPER RAIL COVER (for Driver Side) (a) Disengage the 2 claws to remove the LH seat seat track upper rail cover as shown in the illustration. 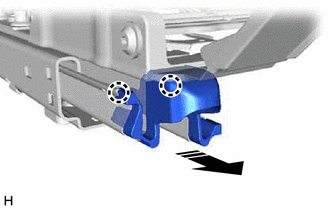
36. REMOVE RH SEAT SEAT TRACK UPPER RAIL COVER (for Front Passenger Side) HINT:
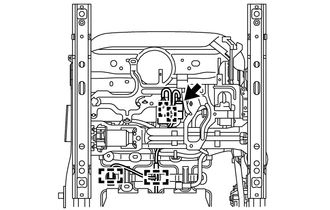
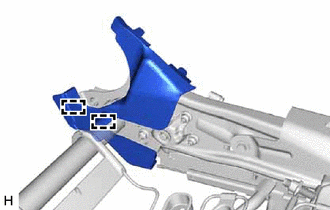
37. REMOVE SEAT CUSHION CLIMATE CONTROL BLOWER (w/ Climate Control Seat System)
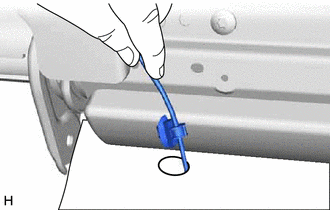
(c) Disengage the claw and wire harness clamp. HINT: Disengage the claw first. (d) Remove the 4 screws and seat cushion climate control blower from the seat cushion blower fan adapter. 38. REMOVE FRONT SEAT WIRE
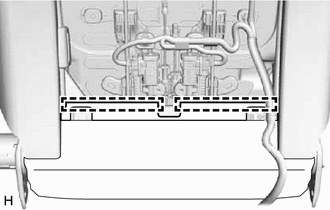
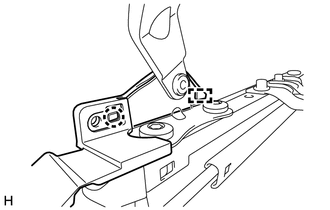
(b) Disconnect each connector and disengage each clamp to remove the front seat wire. 39. REMOVE FRONT SEAT CUSHION SPRING SUB-ASSEMBLY
|
Toyota Avalon (XX50) 2019-2022 Service & Repair Manual > Sfi System: Transmission Range Sensor "A" Circuit Open (P070513,P070562)
DESCRIPTION The park/neutral position switch assembly detects the shift position and sends signals to the ECM. DTC No. Detection Item DTC Detection Condition Trouble Area MIL Memory Note P070513 Transmission Range Sensor "A" Circuit Open All switches are off simultaneously for NSW, P, R, N and D for ...