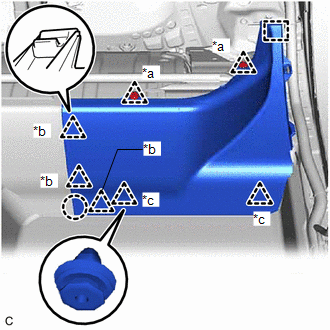
REMOVAL PROCEDURE 1. DISCONNECT REAR CENTER SEAT OUTER BELT ASSEMBLY Click here 2. REMOVE REAR SEAT CUSHION ASSEMBLY Click here 3. REMOVE REAR SEAT CUSHION LOCK HOOK Click here 4. REMOVE REAR DOOR SCUFF PLATE LH Click here 5. REMOVE REAR UNDER SIDE COVER LH
(b) Disengage the claw, 3 clips (B), 2 clips (C) and guide to remove the rear under side cover LH. 6. REMOVE REAR DOOR SCUFF PLATE RH HINT: Use the same procedure as for the LH side. 7. REMOVE REAR UNDER SIDE COVER RH
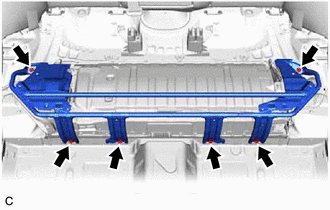
(b) Disengage the claw, 3 clips (B), 2 clips (C) and guide to remove the rear under side cover RH. 8. REMOVE REAR UNDER COVER (a) Pull the rear under cover in the direction indicated by the arrow (1) shown in the illustration to disengage the 2 clips. 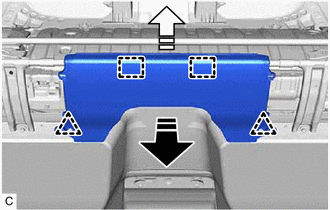
(b) Pull the rear under cover in the direction indicated by the arrow (2) shown in the illustration to disengage the 2 guides to remove it from the rear seat cushion leg sub-assembly. 9. REMOVE REAR SEAT CUSHION LEG SUB-ASSEMBLY
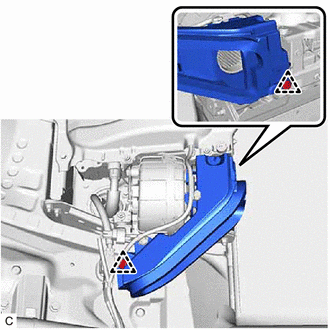
10. REMOVE NO. 1 HYBRID BATTERY INTAKE DUCT
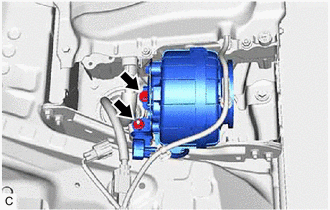
11. REMOVE BATTERY COOLING BLOWER ASSEMBLY
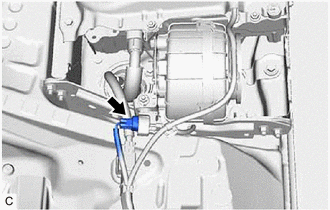
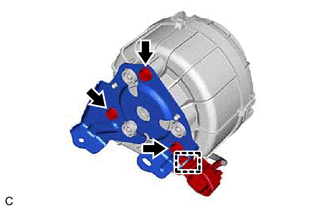
12. REMOVE BATTERY COOLING BLOWER BRACKET
(b) Remove the 3 bolts and battery cooling blower bracket from the battery cooling blower assembly. |
Toyota Avalon (XX50) 2019-2022 Service & Repair Manual > Hood: On-vehicle Inspection
ON-VEHICLE INSPECTION PROCEDURE 1. INSPECT HOOD SUB-ASSEMBLY (a) Check that the clearance measurements of areas a through e are within each standard range. Standard Clearance Area Measurement Area Measurement a 5.15 to 9.15 mm (0.203 to 0.360 in.) b 2.75 to 6.75 mm (0.108 to 0.266 in.) c -1.85 to 2. ...