REMOVAL CAUTION / NOTICE / HINT The necessary procedures (adjustment, calibration, initialization, or registration) that must be performed after parts are removed and installed, or replaced during stereo component amplifier assembly removal/installation are shown below. Necessary Procedure After Parts Removed/Installed/Replaced (for Gasoline Model)
CAUTION: Some of these service operations affect the SRS airbag system. Read the precautionary notices concerning the SRS airbag system before servicing. Click here
 Necessary Procedure After Parts Removed/Installed/Replaced (for HV Model) Necessary Procedure After Parts Removed/Installed/Replaced (for HV Model)
CAUTION: Some of these service operations affect the SRS airbag system. Read the precautionary notices concerning the SRS airbag system before servicing. Click here
PROCEDURE 1. REMOVE FRONT SEAT ASSEMBLY LH Click here
2. REMOVE AUDIO AMPLIFIER COVER
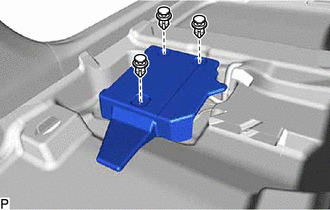
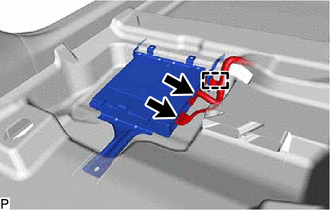
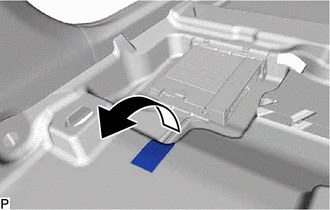
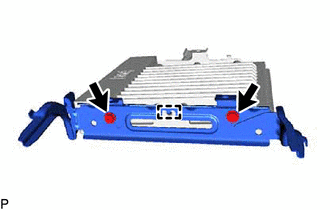
3. REMOVE STEREO COMPONENT AMPLIFIER ASSEMBLY WITH BRACKET
(b) Disengage the clamp.
(e) Disengage the 2 guides and remove the stereo component amplifier assembly with bracket as shown in the illustration. 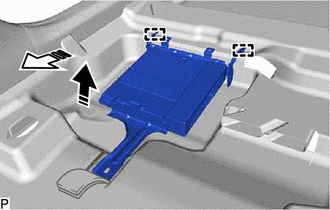
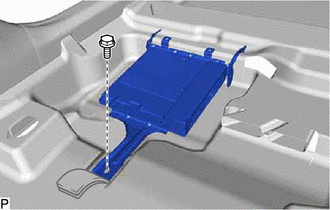
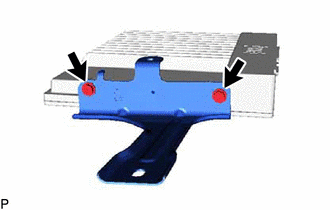
4. REMOVE NO. 1 AMPLIFIER BRACKET
(b) Disengage the guide to remove the No. 1 amplifier bracket. 5. REMOVE NO. 2 AMPLIFIER BRACKET
6. REMOVE STEREO COMPONENT AMPLIFIER ASSEMBLY | ||||||||||||||||||||||||||||||||||||||||||||||||||||||||||||||
Toyota Avalon (XX50) 2019-2022 Service & Repair Manual > Airbag System(for Gasoline Model): Short in P/T Squib (LH) Circuit (B1905-B1908)
DESCRIPTION The front pretensioner squib LH circuit consists of the airbag ECU assembly and front seat outer belt assembly LH. The airbag ECU assembly uses this circuit to deploy the pretensioner when deployment conditions are met. These DTCs are stored when a malfunction is detected in the front pr ...